# Using StackForms to simplify the configuration
In this step, we will simplify the creation of our stack by adding Cycloid StackForms view. This feature allows users to create HTML forms on top of sample files. Those can be from pipeline variables, Terraform, and Ansible.
Follow those steps to apply all changes described in this step
By adding a .forms.yml file into your stack, at the same level as the .cycloid.yml file, the Stackforms view will be available for stacks users.
default:
  pipeline:
      Application-code:
      - name: "Application git public url"
        description: "The url of the public GIT repository containing the source code of the application"
        key: code_git_public_repository
        widget: simple_text
        type: string
        default: "https://github.com/cycloid-community-catalog/docs-step-by-step-stack"
      - name: "Application git repository branch"
        description: "The branch of the public GIT repository containing the source code of the application"
        key: code_git_branch
        widget: simple_text
        type: string
        default: code

  terraform:
    configuration:
      - name: "Azure instance type"
        description: "The type of instance you want to create"
        key: instance_type
        widget: slider_list
        type: string
        values:
        - Standard_DS1_v2
        - Standard_DS2_v2
        - Standard_DS3_v2
        default: Standard_DS1_v2
2
3
4
5
6
7
8
9
10
11
12
13
14
15
16
17
18
19
20
21
22
23
24
25
26
27
28
A forms file use YAML syntax and have as top level section the use-case name of your stack. If you don't, just put default. Look for use-case in .cycloid.yml doc to know more about it
The second level is the name of the technology. Cycloid uses this to know how to render your *.sample files with the variables defined in the .forms.yml. In our example, we use two technologies. We defined one pipeline variable and one Terraform variable.
The third level defines visual groups Application-code and configuration. The goal is to simplify the user's understanding of the variables of a stack. You would probably create a group for Cloud provider configuration, one for the source code access, and one for the actual configuration of the application. It will visually group the widget in the Cycloid dashboard, making it easier for a user to read.
The last part is widgets. A widget defines the name of a variable (key) to replace in your *.sample files and what kind of widget is displayed to the user. To know more about all kinds of widgets available in Cycloid, you should look at our Cycloid forms guide.
Add and commit those changes in Git:
git add .
git commit -m "Step 8"
git push origin stacks
2
3
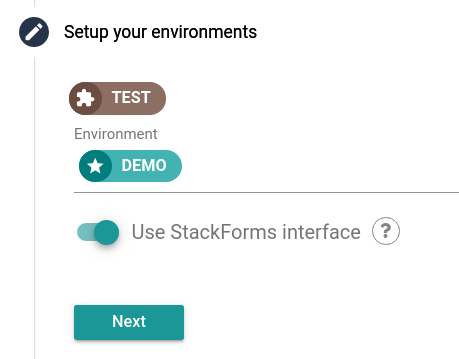
You should be able to test forms right away for any new project or environment created with this stack.
To test it, you could try to configure a new demo environment.
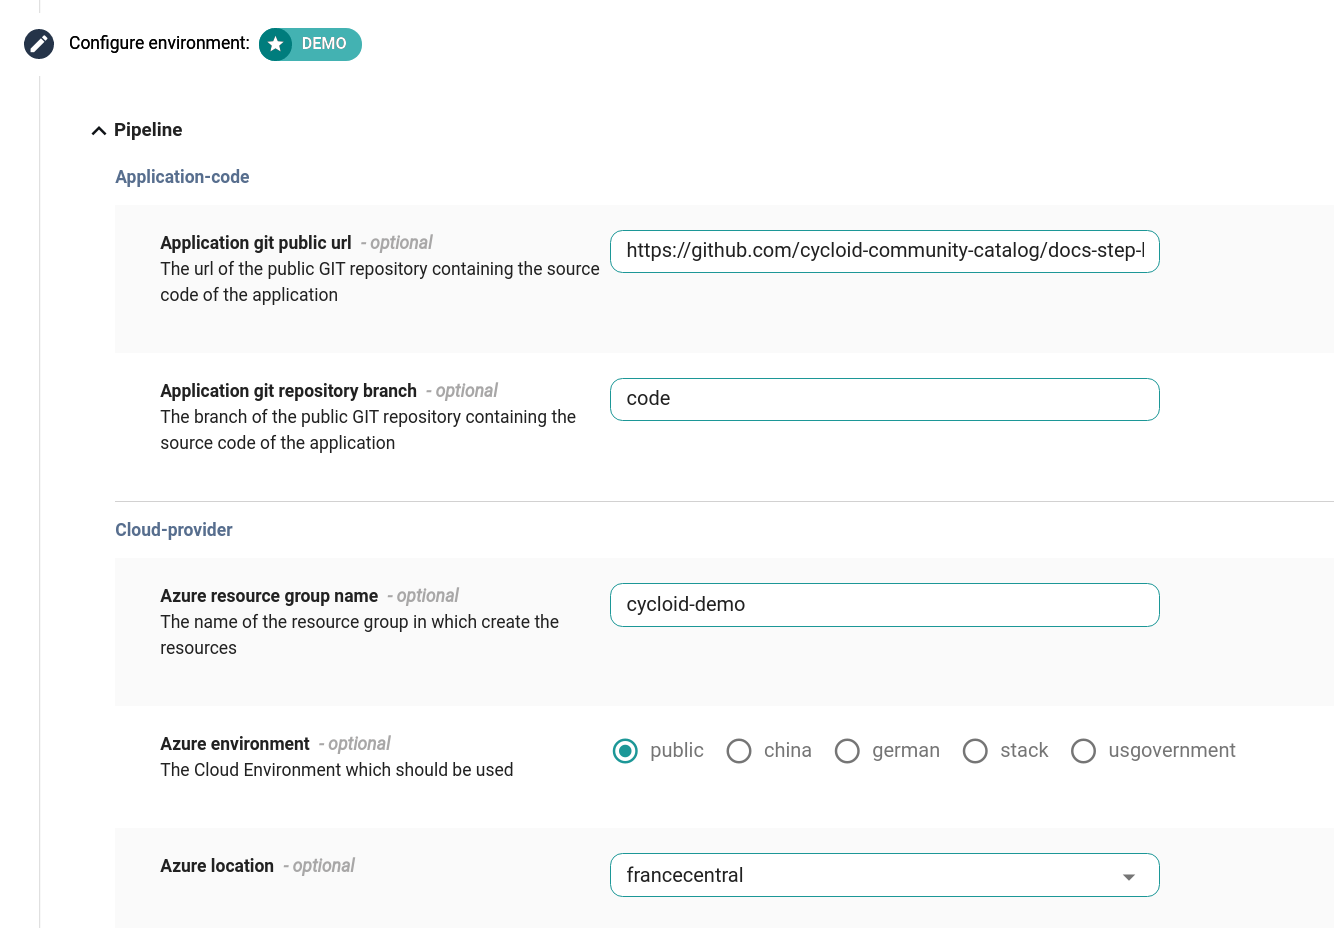
After clicking next, you should see the form view that has been configured:
Get back: We will not create a different environment right now. Let's click on snowy, our project name on the top menu to get back to our test environment for the next training step.

# Key points to remember
- We can simplify the creation of our stack by adding a Cycloid StackForms view
- This feature allows users to create HTML forms on top of sample files
- Those can be from pipeline variables, Terraform, and Ansible
- A forms file use YAML syntax
- StackForms need a
.forms.ymlfile and offer a lot ofwidget