# Infra Import

# Introduction
Infra Import is an infrastructure-as-code generator based on TerraCognita, our open source CLI tool. Connect it to your manually-deployed cloud infrastructure and Infra Import will create your Stacks and push them to the predefined Catalog repository.
# Prerequisites
To use Infra Import make sure you have these set up on your Cycloid account:
| prerequisite | required | description |
|---|---|---|
| Git credentials | Yes | Will be used along with your catalog/config repository to store the Infra Import output |
| Cloud provider credentials | Yes | To allow Infra Import to fetch your cloud resources |
| Catalog repository | Yes (with write access) | Will allow you to store the terraform infrastructure code in a Stack form |
| Config repository | Yes (project path) | To store project related artifacts in case you choose to create a project during the Infra Import process |
| Object storage (External Backend) | No | To store the .tfstate file. Can be an S3 bucket on AWS, bucket on GCP Cloud Storage, or OpenStack's Swift container. |
# Feature walkthrough
Infra Import needs some upfront configuration to be able to fetch the right resources for you. This section will guide you through the process of setting up all the necessary parameters to perform a successful import.
# How to access Infra Import
You can start the Infra Import process by:
- Going to the Stacks page
- Clicking the "Create a new Stack" button
- Selecting the "Import your infrastructure" option
# Infra Import start screen
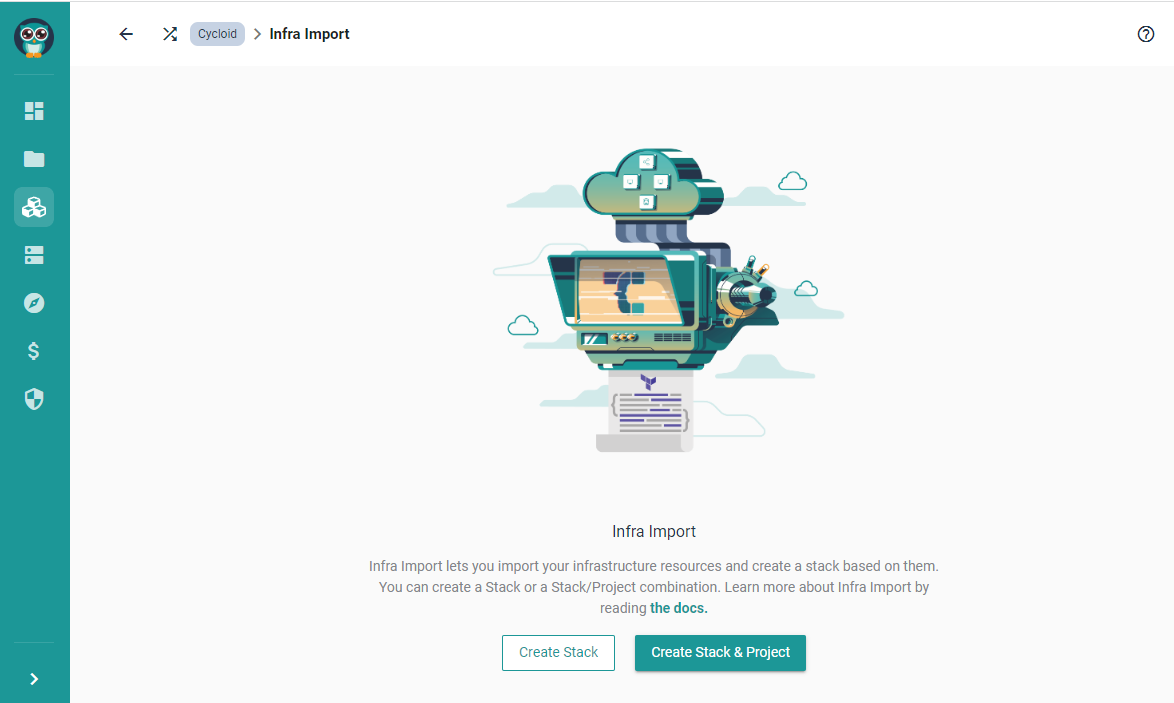
Once you land on the start screen you can choose your path and take either the "Create Stack" or "Create Stack & Project" route. Note that if one of the prerequisites isn't met the feature will be disabled.
| Path | Prerequisites | Description |
|---|---|---|
| Stack |
| The output of this path will be a Stack that can be used later when creating projects. Choosing this path is optimal in case you'd want to create several stacks one by another, or when you, or someone from your team, will create a project out of the stack at an undetermined time in the future |
| Stack & Project |
| In this scenario Infra Import will create a Stack, Project, an External Backend, if one was configured. This option is great if you'd like to use the imported infrastructure straight away |
# Select Provider
Here you can simply select the cloud provider from which you would like to fetch the infrastructure resources. As of writing, we currently support AWS, GCP, and Azure. We are planning to add OpenStack and FlexibleEngine support in the future.
# Configure Provider
You can add your cloud provider configuration in this step. It will consist of the already mentioned credentials as well as provider-specific fields (i.e. AWS Region)
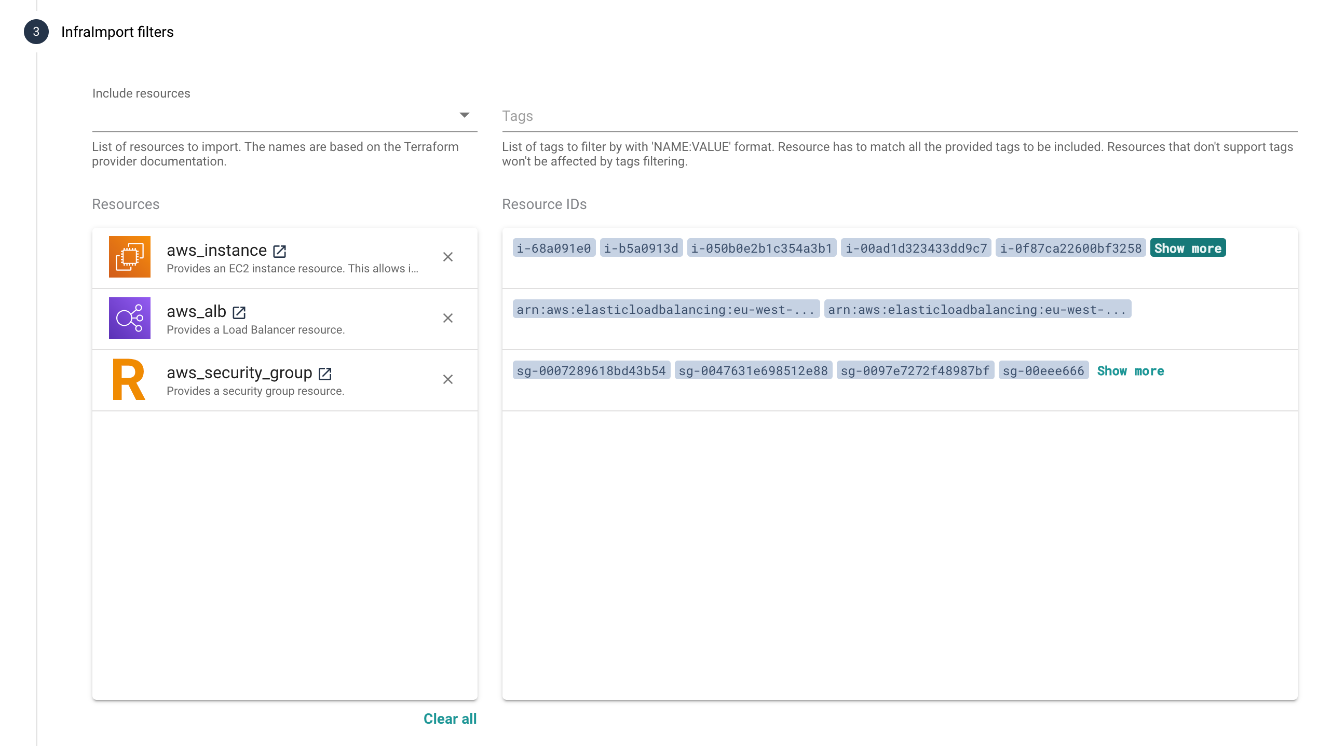
# Infra Import Filters
TIP
You can skip the filters step. In this case, all the supported resources will be fetched from the cloud provider. Bear in mind it may take some time depending on the size of your infrastructure.
This step allows you to narrow down the import to specific resources. It can be useful in case you have multiple applications running on your cloud infrastructure and want to create a separation of concerns with the stacks. There are two ways of filtering resources:
- Resources filter: you can pick the resource types that should be imported by Terracognita. Once you select the resource type, Infra Import will connect to your cloud provider and pre-fetch the resources, so that you can review if the resource IDs match your expectations. (Missing resource? Contact us (opens new window)).
- Tags filter: if your infrastructure resources are tagged, you can use tags to narrow down the import. Type the tag in a format
key:valuei.e.:env:production. You can add multiple tags for fine-grained control.
# Infra Import Variables

Once you have the resources selected, you can also choose the attributes which will be turned into Terraform variables.
Variables will help to expose resources attributes as stack parameters. For example with aws_instance, instance_type (opens new window) can be selected to let users choose the right sizing for their AWS EC2 instance.
# Stack information
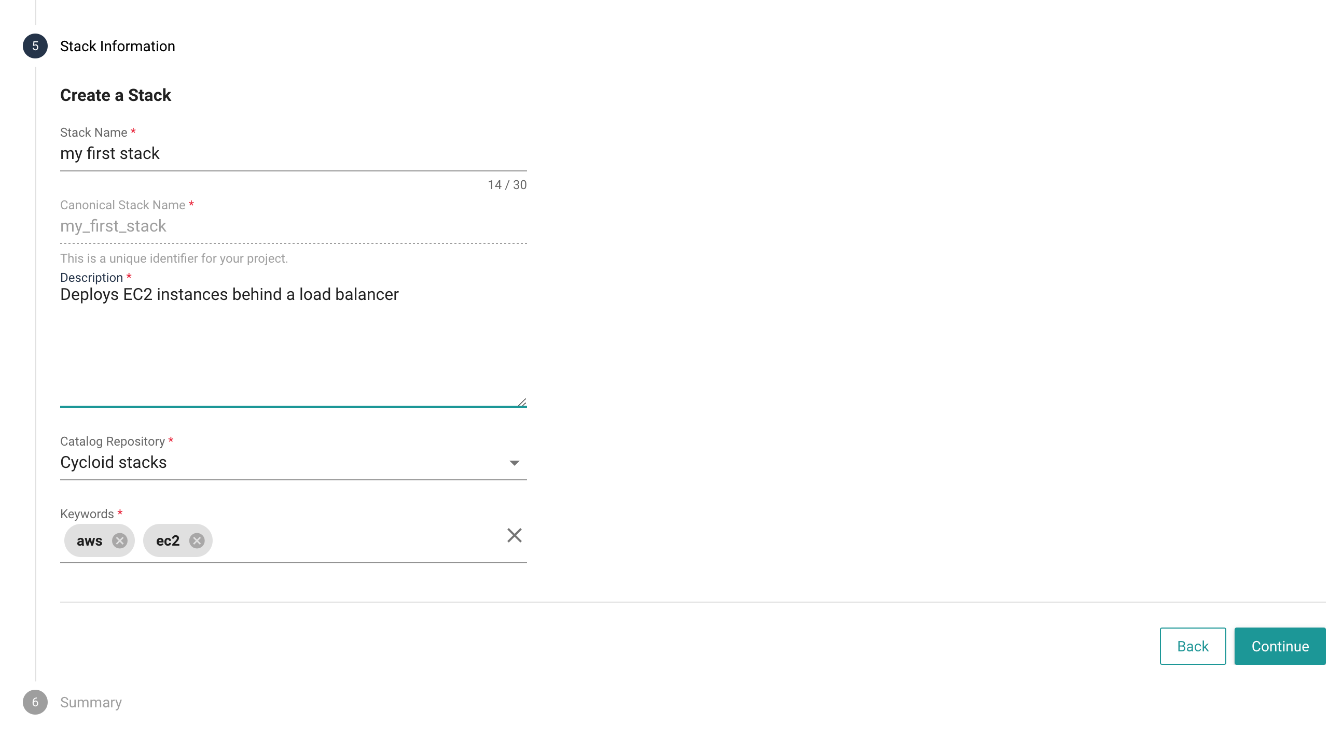
This step allows to enter Stack information:
- Name
- Description
- Catalog repository where the stack will be stored
- Keywords to help with the stack discovery on the Stacks page
Name, Description, and Keywords will be displayed and used on the Stacks page. It's a good practice to take some time and fill in those fields with meaningful data to aid the future users of the Stacks.
# Project Details (Stack & Project path only)
Create Stack & Project
You can choose Create Stack & Project path on the Infra Import start screen. This option allows to additionally create a Project which will be based on the Stack created during the import. It's essentially a shortcut so that you don't have to go through the project creation after the stack is imported. Choosing this path adds two steps to the wizard

This step allows to enter project information:
- Name
- Description
- Config repository where the stack config will be stored
- Environment - You can select or name your environment. Currently, Infra Import supports one environment per project.
# External Backend Configuration (Stack & Project path only)
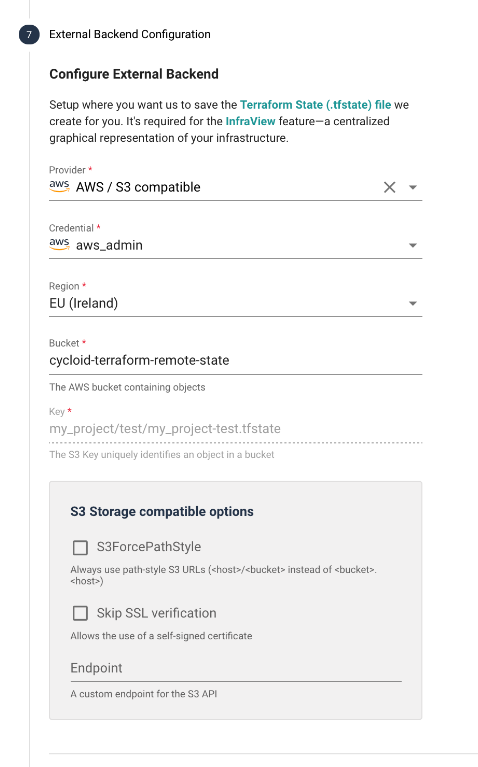
This step lets you configure the External Backend - object storage for your .tfstate (opens new window) file. Cycloid uses the .tfstate to create InfraView, live, visual representation of your infrastructure. Most of the fields will be filled out based on the info given in the previous wizard sections, but can still be changed to match your preferences.
# Infra Import Summary
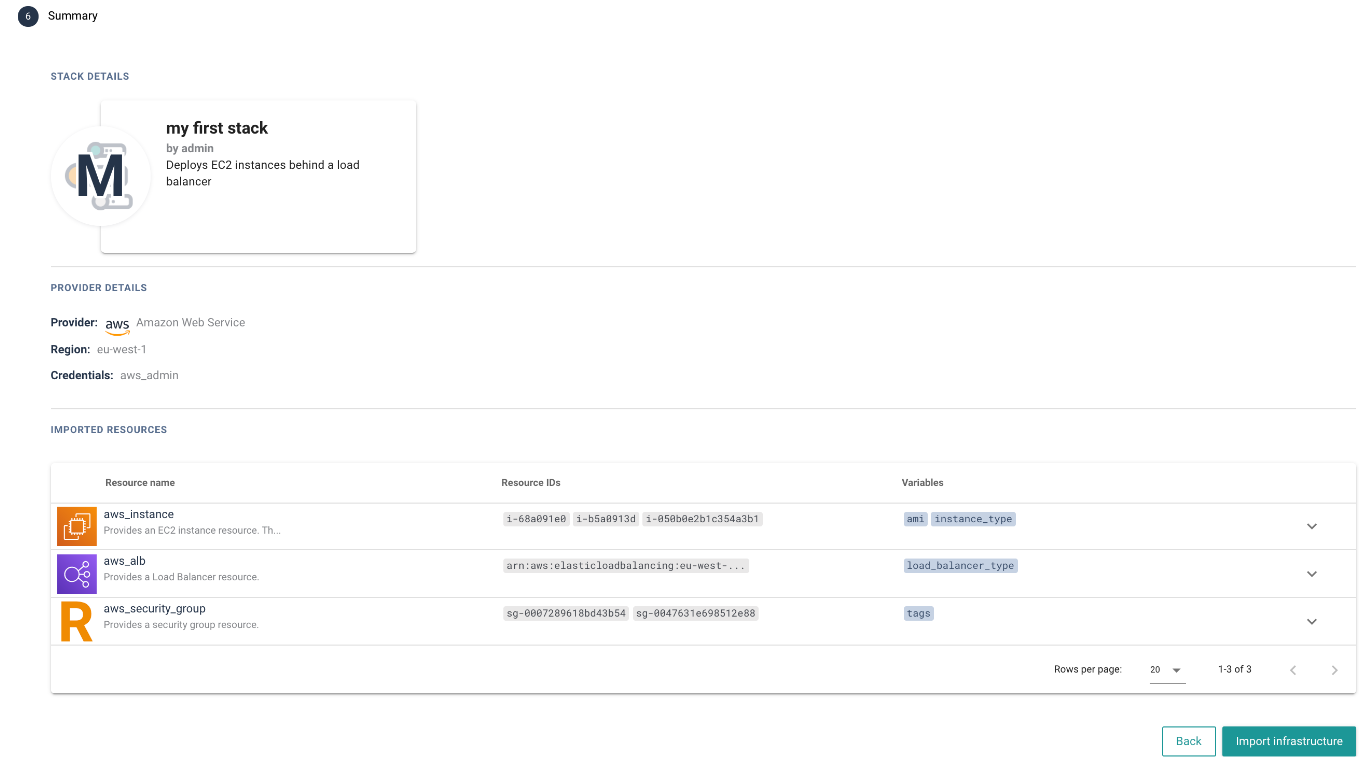
In this step you can view the summary of all the data that has been added throughout the wizard:
- The Stack card preview
- The Provider details (Also, Project and External Backend info in the
Create Stack & Projectpath) - A table of selected resource types with the resource IDs and variables. You can expand each list item to see all the related resources/variables
You can go back to the previous steps to make any adjustments. When the configuration looks good click the Import infrastructure button to begin the import!
# Infra Import progress
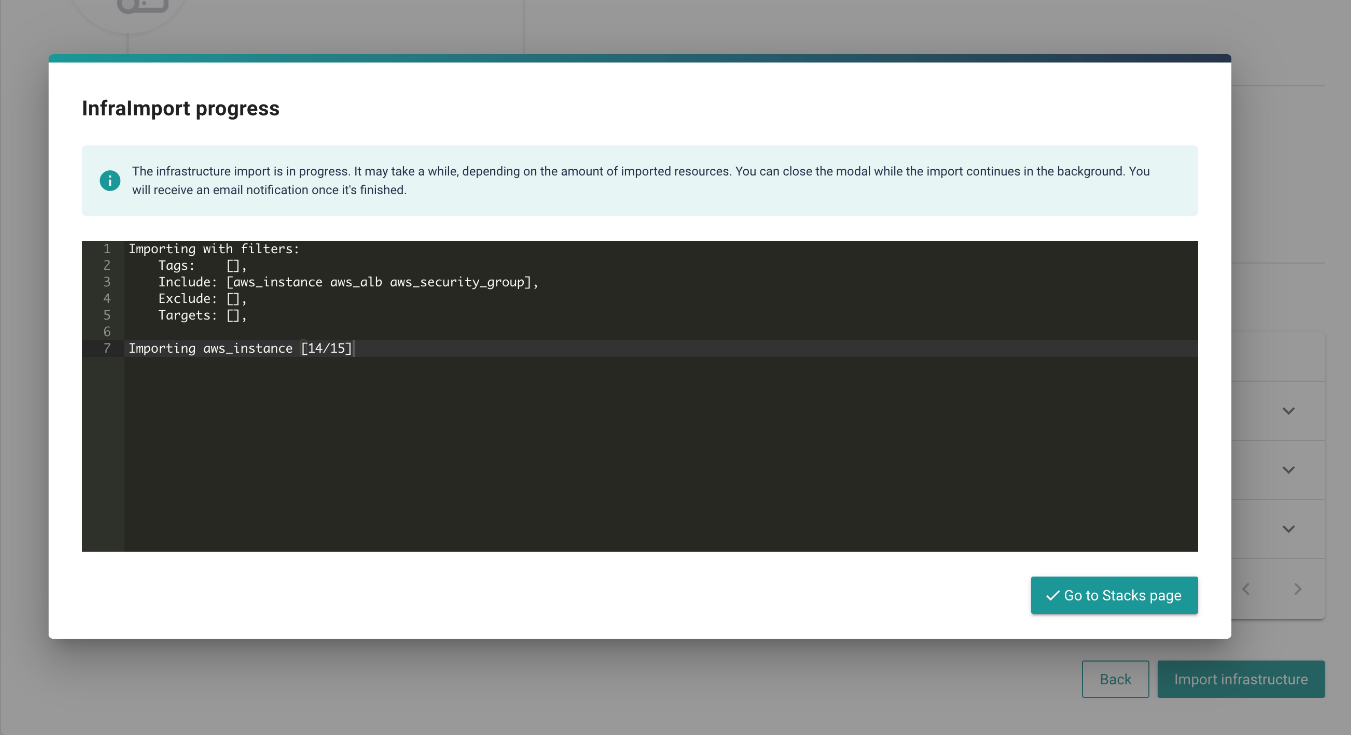
Once the import has started, a modal will be displayed. It shows the status as well as the current progress of the import. Once the import is finished, The import was successful notification message will be shown. The modal can be closed before the import is finished though and you can proceed to fulfill other tasks. The import will continue in the background. Cycloid will send you a notification email once it's finished.
You can also check the import status on the related Project/Stack cards on the Projects/Stacks pages. They will have the importing label present during the import. Clicking on the Project/Stack card in the importing state will open the import progress modal where you can see the detailed log.
 |  |
|---|
There may be a situation where the import ends with an error. In this case, a failed label will be displayed on the Project/Stack card. You may try retrying the import by clicking the retry icon, or the retry button in the import progress modal.
# Infra Import output
Once the import succeeded, the stack reflecting your imported resources should be stored in the selected Catalog repository and visible on Cycloid console. The Stack respects Cycloid principles and can be used on new projects.
When checking on Git, a folder named with your Stack name should be present and contain:
Generated terraform code is structured as terraform module (opens new window) where each file aggregates the resources from the same "category".
Pipeline is the definition of jobs, tasks and variables preconfigured to run terraform plan/apply within your project. Terraform changes automatically trigger your pipeline which helps you to get better control of your infrastructure.
For more specific needs, Stack can be improved in a different ways. Create my own Stack documentation is a good place to start.