# Create a Terraform module and add Terraform apply job in the pipeline

Terraform plan job is now configured and working. It's time to push some real Terraform codes to describe a cloud instance using Terraform module format (opens new window).
Follow those steps to apply all changes described in this step
The previous lines create a Terraform module that contains the description of a cloud instance, and an init bash script to run at startup. To know more about Terraform module, feel free to read the Terraform module documentation (opens new window)
Our Terraform now has the following files:
- A module under the
terraform/module-<provider_name>directory - A main Terraform file to simply call the module
terraform/main.tf - An output (opens new window) file
terraform/outputs.tfto forward module outputs to the pipeline. We will use it later. - Several files inside the module
- Module output file
terraform/module-<provider_name>/outputs.tfto specify which information the module will return. - Variables file
terraform/module-<provider_name>/variables.tfto define what are the parameters we can pass to the module. - A
terraform/module-<provider_name>/vm.tffile containing the definition of the cloud instance. - The template of the startup script
terraform/module-<provider_name>/userdata.sh.tplrun in the instance
- Module output file
TIPS
Notice how customers usually use our defined variables with those specific tags env, project, customer, and cycloid.io, used by some of our features like billing to filter components.
  tags {
    "cycloid.io" = "true"
    env          = var.env
    project      = var.project
    customer     = var.customer
  }
}
2
3
4
5
6
7
The userdata.sh.tpl startup script will use our two previously defined variables to know the URL and the version (commit id) we want to deploy on it.
stack-sample/terraform/provider.tf
variable "git_code_commit" {
  default = "origin/code"
}
variable "git_code_repo" {
  default = "https://github.com/cycloid-community-catalog/docs-step-by-step-stack.git"
}
2
3
4
5
6
NOTES
We use a startup bash script to deploy the website source code on our instance to make this guide easier. On production, you might want to go using dedicated tools like Ansible
Our new Terraform code now requires 2 variables to be run git_code_commit and git_code_repo. To get the commit id we will need a little bash script.
As we will need it in the Terraform plan and apply job, we will introduce a standard YAML tip, allowing us to reuse YAML code as a template with YAML Alias indicators (opens new window).
To summarize it will allow us to define a YAML code that we will put under shared section, and the name &task-get-commit. That we will be able to reuse using *task-get-commit.
stack-sample/pipeline/pipeline.yml
shared:
  - &task-get-commit
    task: get-commit
    config:
      platform: linux
      image_resource:
        type: docker-image
        source:
          repository: cycloid/cycloid-toolkit
          tag: latest
      run:
        path: /bin/bash
        args:
        - -c
        - |
          DIR=${PWD}
          echo "git_code_commit = \"$(cat git_code/.git/ref)\"" | tee -a extracted-vars/terraform.tfvars
          echo "git_code_repo = \"${GIT_CODE_REPO}\"" | tee -a extracted-vars/terraform.tfvars
      params:
        ENV: ((env))
        GIT_CODE_REPO: ((code_git_public_repository))
      inputs:
        - name: git_code
      outputs:
        - name: extracted-vars
          path: "extracted-vars"
2
3
4
5
6
7
8
9
10
11
12
13
14
15
16
17
18
19
20
21
22
23
24
25
26
The code above defines a pipeline task (opens new window) used in our terraform plan and terraform apply jobs.
The task expects our website source code (git_code) as input. Then run a bash script to generate a terraform variables file terraform.tfvars in the defined output extracted-vars.
The Terraform code is now ready to be tested and applied. To follow best practices, we will implement a "manual validation" in the pipeline to run terraform apply after a terraform plan.
Let's now define the Terraform apply job using our previously defined task.
stack-sample/pipeline/pipeline.yml
groups:
- name: overview
  jobs:
  - unittest
  - terraform-plan
  - terraform-apply

jobs:
  - name: terraform-plan
...
    plan:
      - do:
        - get: git_code
          trigger: true
          passed:
            - unittest
        - *task-get-commit
        - put: tfstate
          params:
            plan_only: true
            terraform_source: git_stack/stack-sample/terraform
            var_files:
              - extracted-vars/terraform.tfvars

  - name: terraform-apply
    build_logs_to_retain: 10
    plan:
      - do:
        - get: git_stack
          trigger: false
          passed:
            - terraform-plan
        - get: tfstate
          trigger: false
          passed:
            - terraform-plan
        - get: git_code
          passed:
            - terraform-plan
        - *task-get-commit
        - put: tfstate
          params:
            plan_run: true
            terraform_source: git_stack/stack-sample/terraform
            var_files:
              - extracted-vars/terraform.tfvars
2
3
4
5
6
7
8
9
10
11
12
13
14
15
16
17
18
19
20
21
22
23
24
25
26
27
28
29
30
31
32
33
34
35
36
37
38
39
40
41
42
43
44
45
46
This sample implements a manual approval by adding the terraform-apply without any trigger: true configured on the get resources. That means the terraform-apply will never be triggered automatically.
The usual workflow is to trigger terraform-plan, let a user read the plan's output, and if it's ok, manually trigger the terraform-apply job by clicking on it and pressing the + button 
In both jobs, we added our special task defined earlier, *task-get-commit. As seen above, this task creates a variable file extracted-vars/terraform.tfvars that we specify during the call of the Terraform resource using the var_files option.
Add and commit those changes in Git:
git add .
git commit -m "Step 4"
git push origin stacks
2
3
Get back to Cycloid's dashboard, and click on the Refresh pipeline button 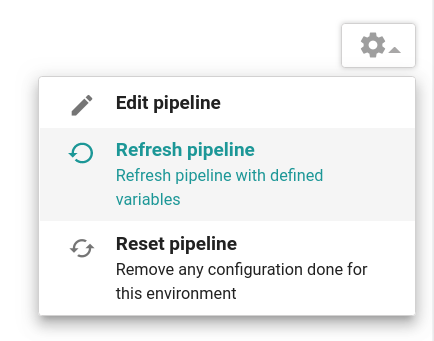 .
.
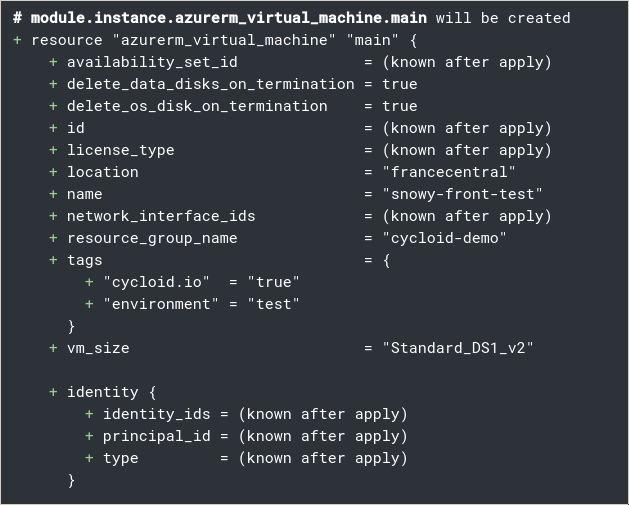
It's time to create our instance, run the terraform-plan job, the output should inform us that Terraform is about to create our new cloud instance:
If everything is ok for you, as described earlier, go on the terraform-apply job and trigger it:
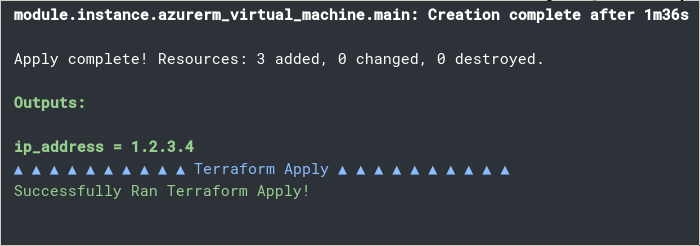
After the apply, a new cloud instance should be present on your cloud provider console.
# Key points to remember
- You can use Terraform module (opens new window) to deploy one or multiple resources and configurations
- You can reuse YAML code as a template with YAML Alias indicators (opens new window)
- A job with no resource trigger (
trigger: false) configured has to be triggered manually. We use to call them "manual approval"