# Deploy
Today there are 2 ways to start a new project in Cycloid:
- Selecting an existing
stack - Using Infra Import (by TerraCognita) to import an existing infrastructure from your Cloud provider as a stack
# Create my first project with pre-configured resources
This exercise aims to create a project using the pre-configured resources provided, to show best practices and to save time.
# Naming your project
You should give your project name and description using a shared convention that includes useful, deducible information so team members won't get confused between different projects.
# Before you begin
The following sections will guide you through the deployment of the Cycloid getting started stack. The goal is to create a compute instance on your desired cloud provider. Depending on the chosen provider, you'll need to provide several elements.
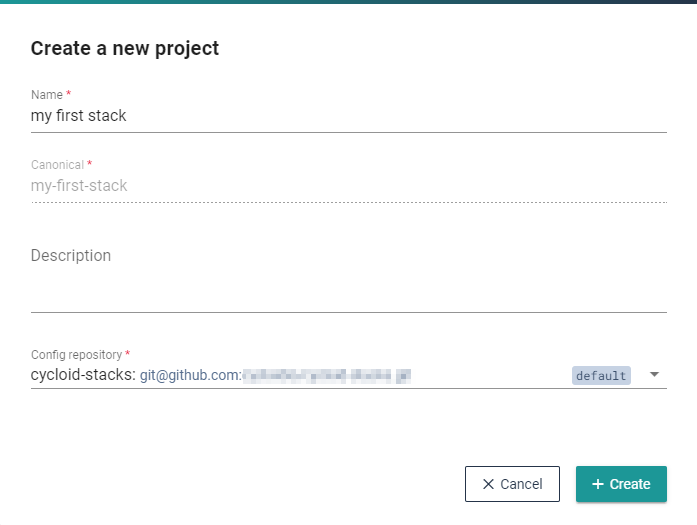
# Project
To start your journey, start by creating a new project. On the left menu click on All Projects

Then click on the button Create new project and enter a project name
# Select a stack
A list of all available stacks will be displayed, including Cycloid public stacks and private stacks in your organization.
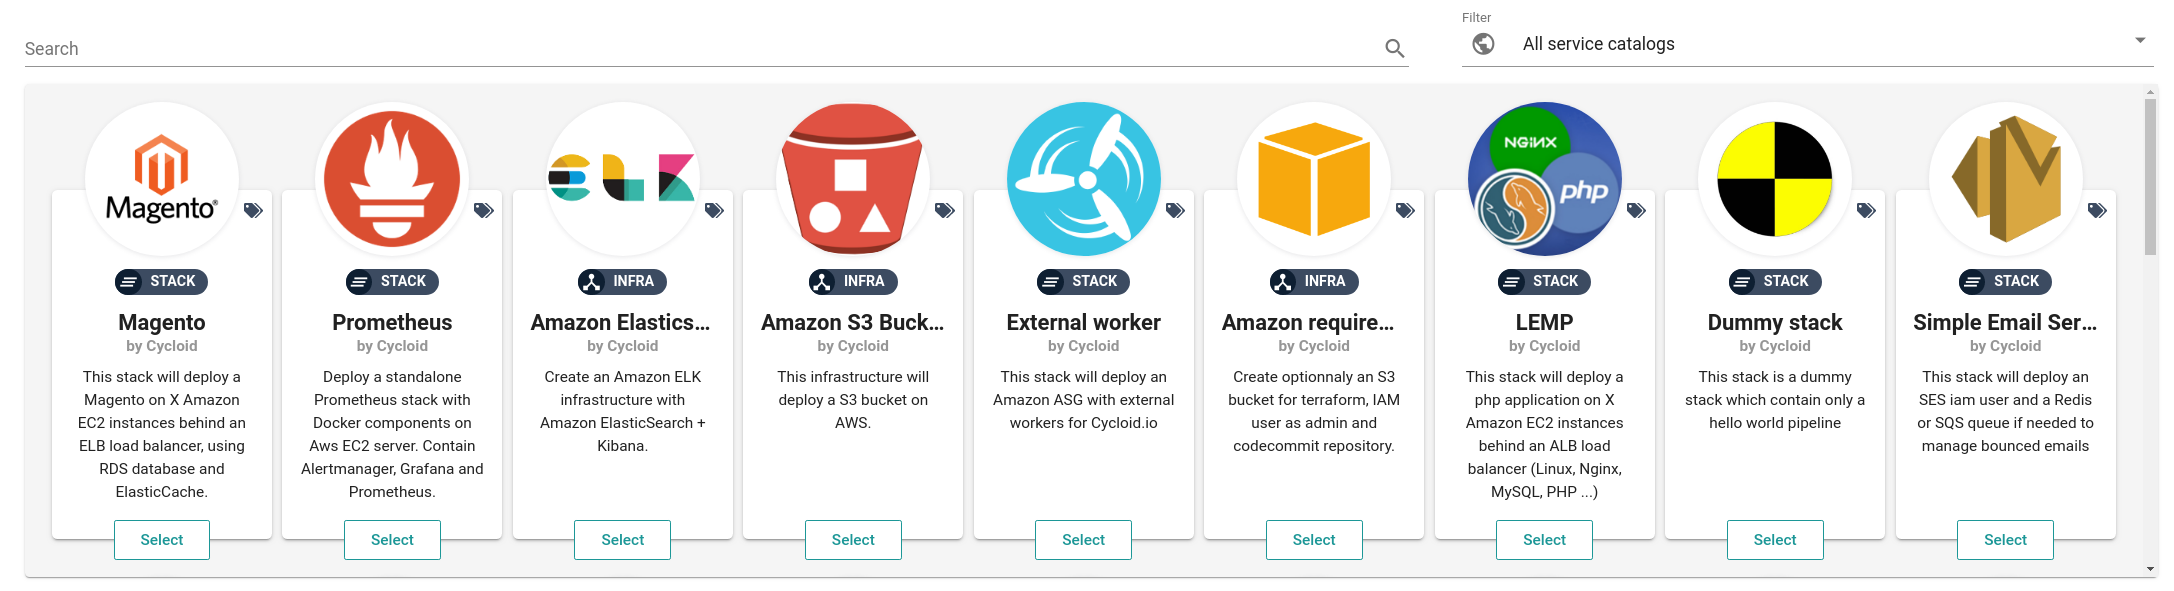
Let's begin by using the getting started stack. Type in the search area getting-started and select the getting started stack.

# Environments
An environment describe a deployment of a stack. Stacks are automated and reproducible via Infrastructure as Code (IaC). Which mean,
for each new environments you will deploy the same infrastructure but you can specify different configuration and variables.
Commonly, environments are named dev, staging and prod, but this is just a convention and can be anything.
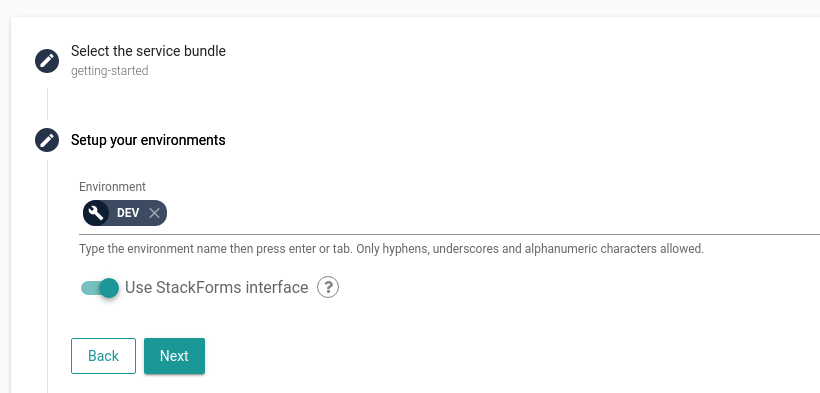
Make sure the Use StackForms interface is checked and click the next button.
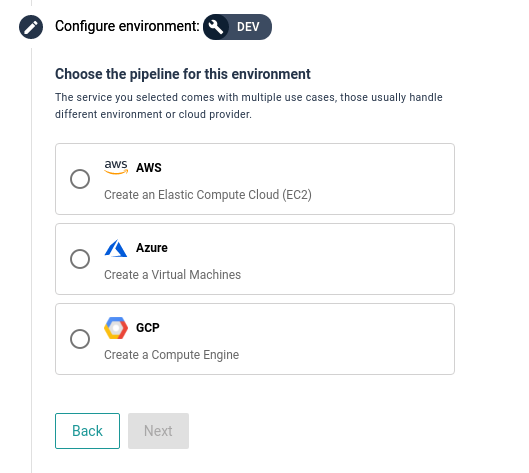
Select the use-case you would like to use and proceed to the configuration section.
This is not always the case but a stack can provide different use-cases. Those are usually here for a stack to offer to the end-user the choice between different deployment workflow or cloud providers for example.
Here in the getting started stack, each usecase correspond to a public cloud provider. Select the one you would like to test and jump to the next section.
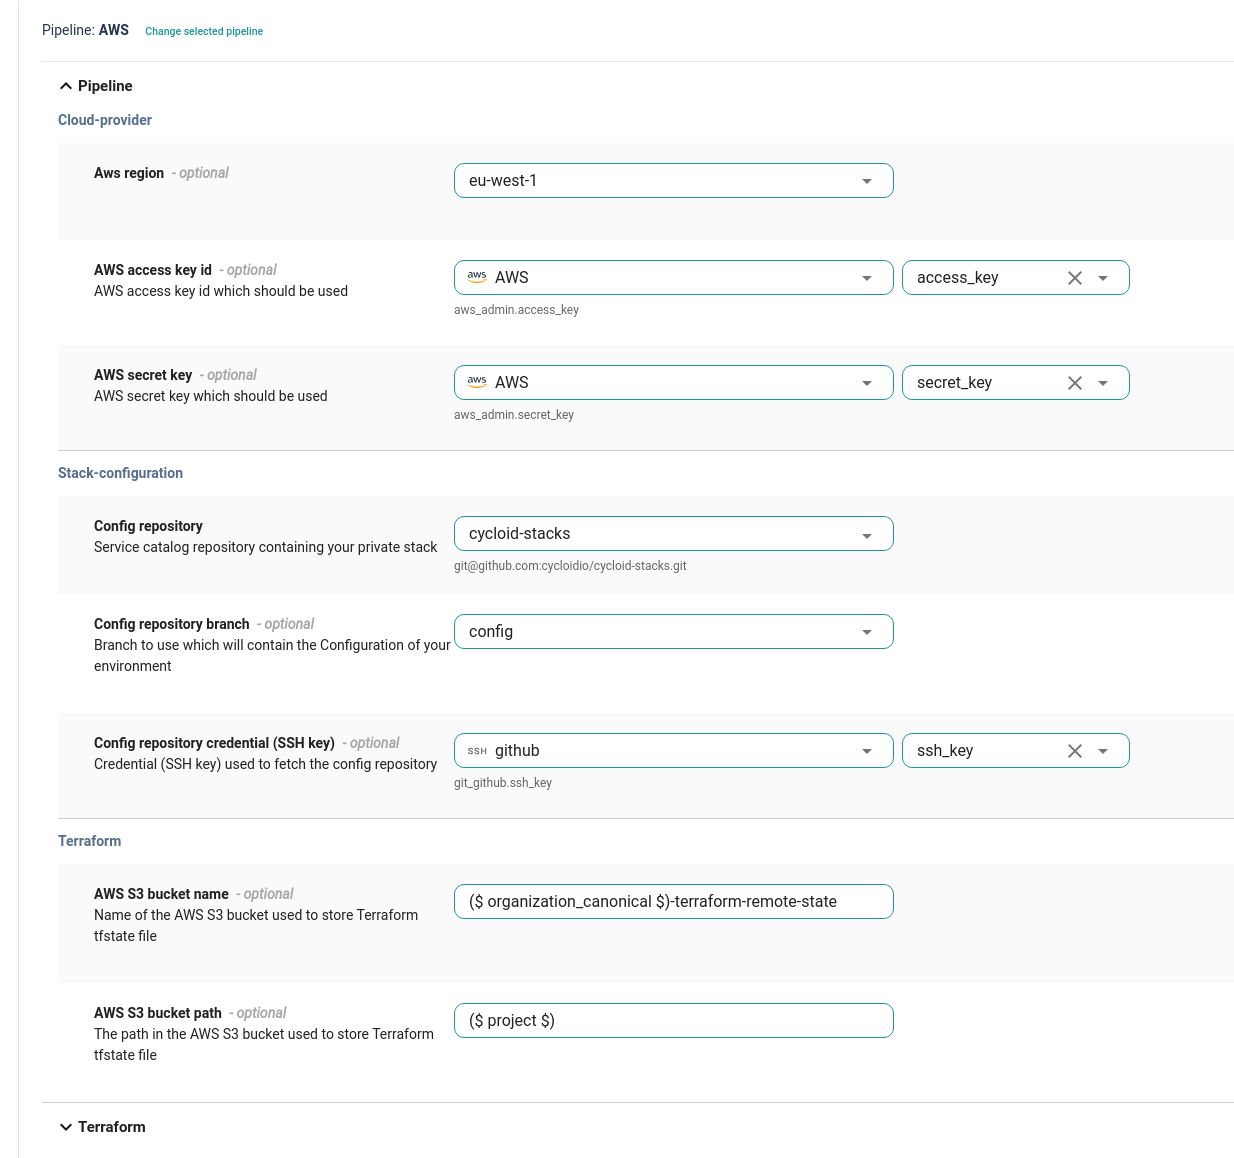
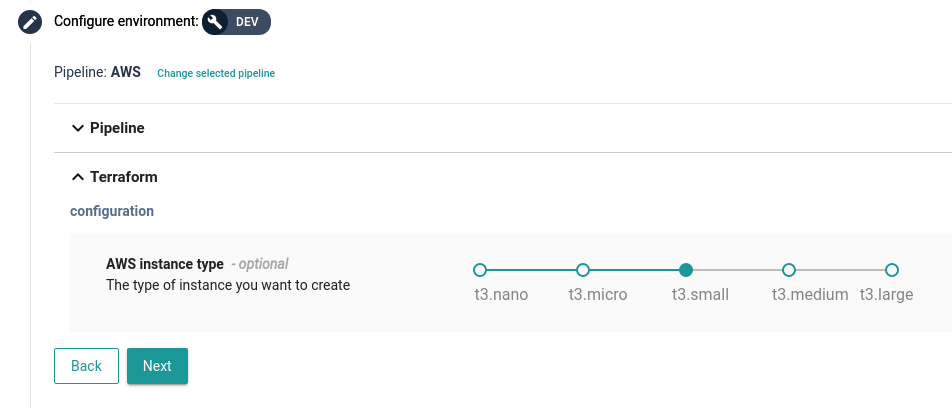
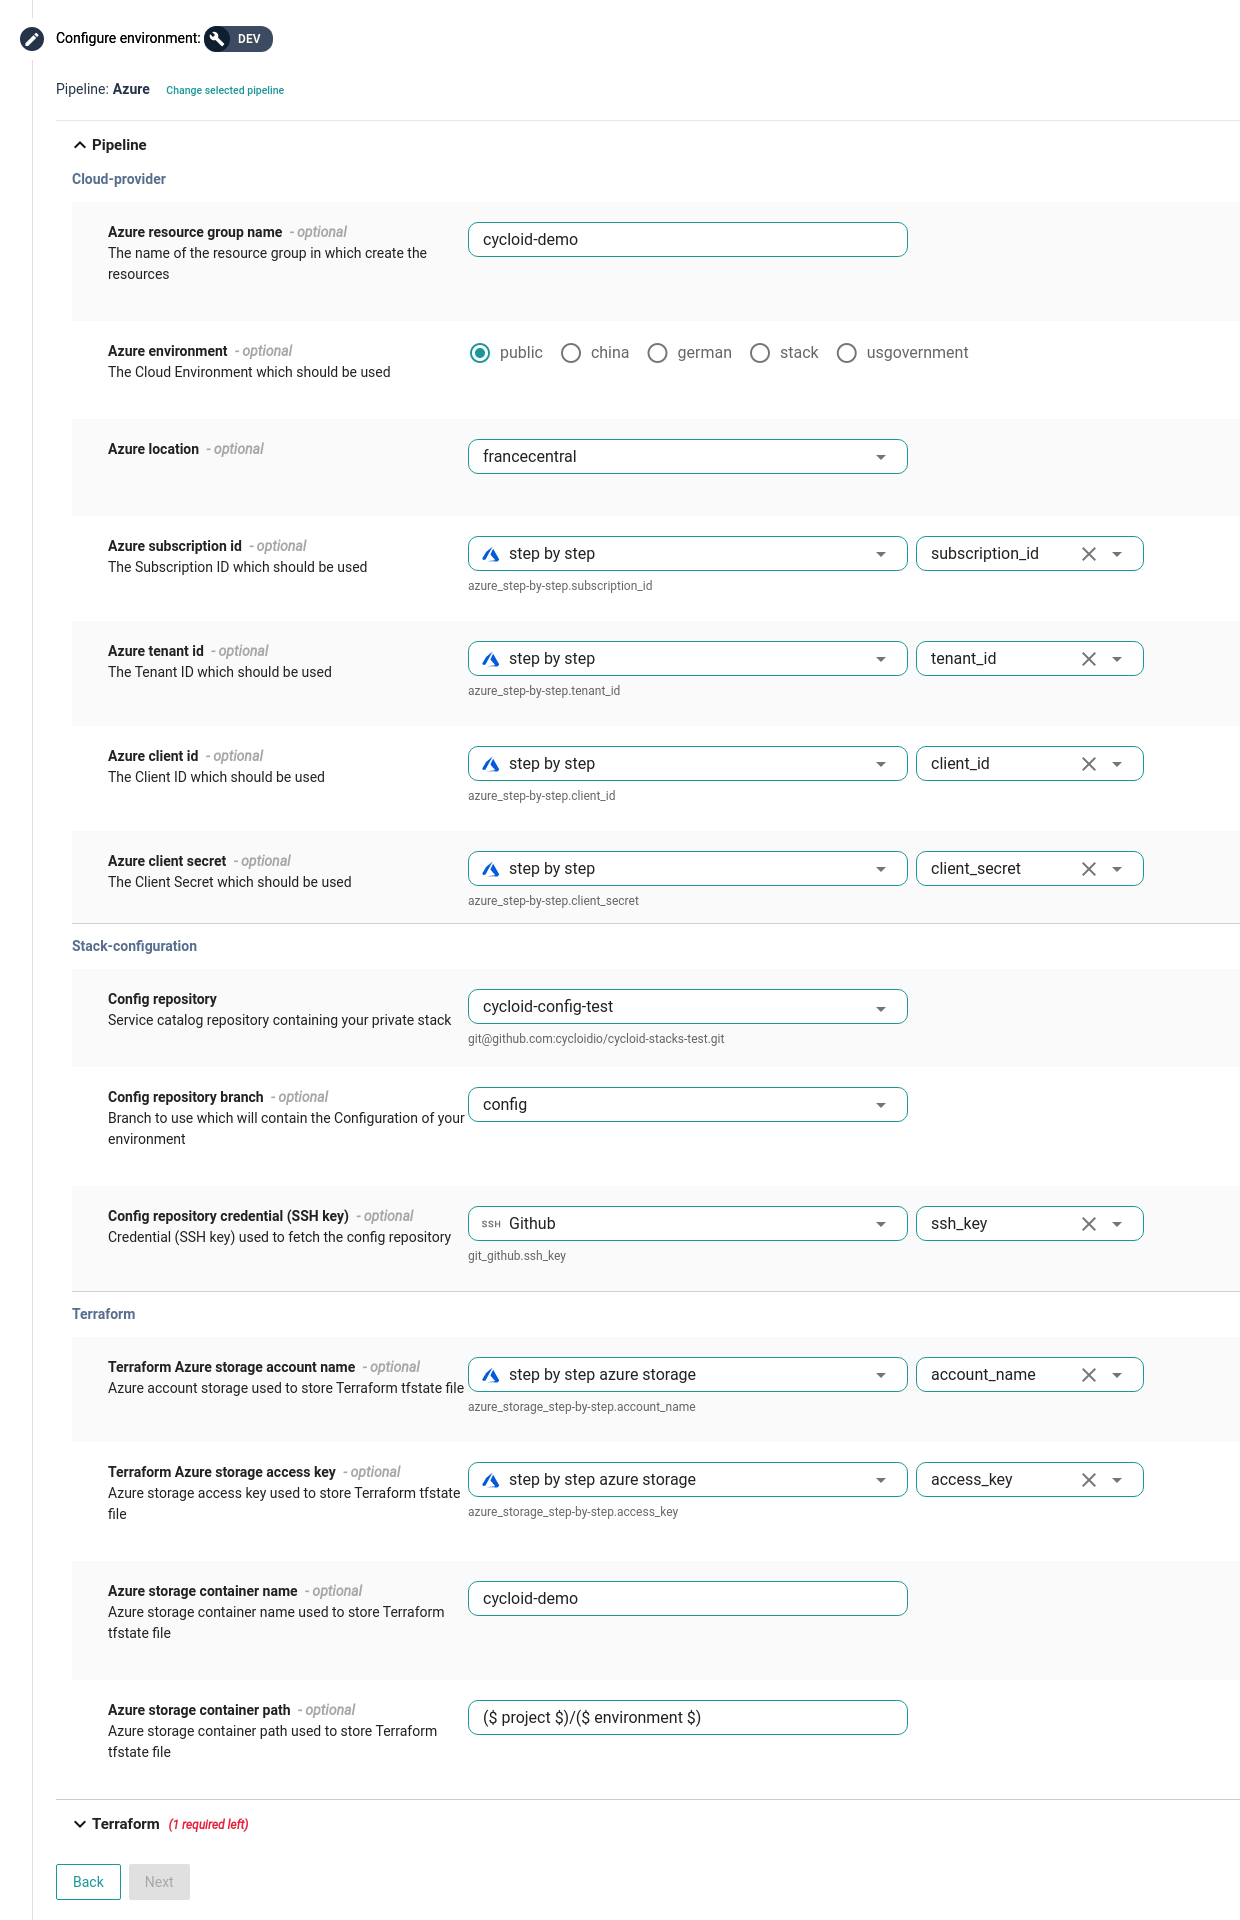
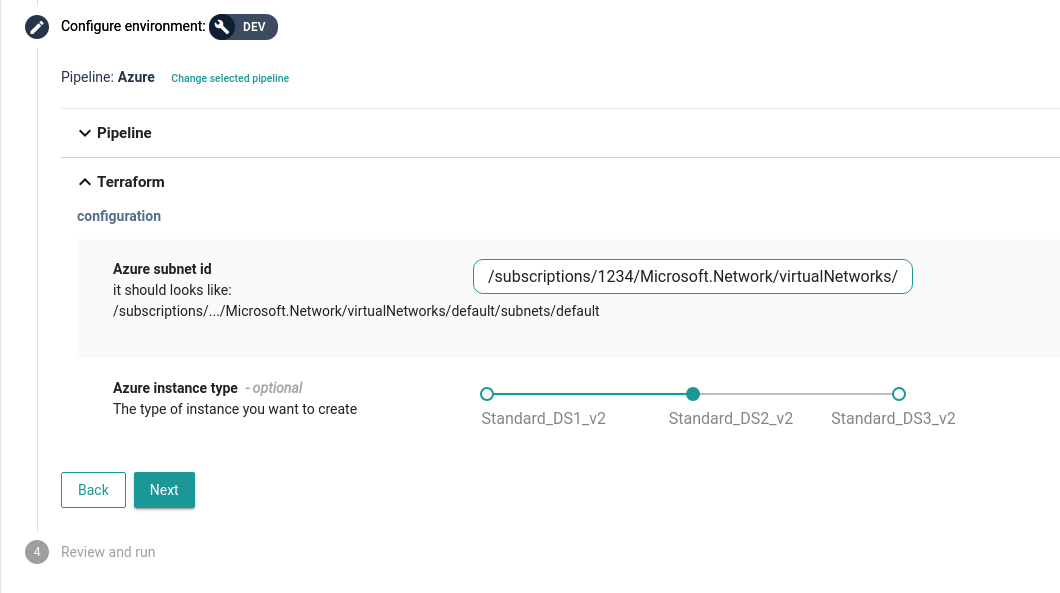
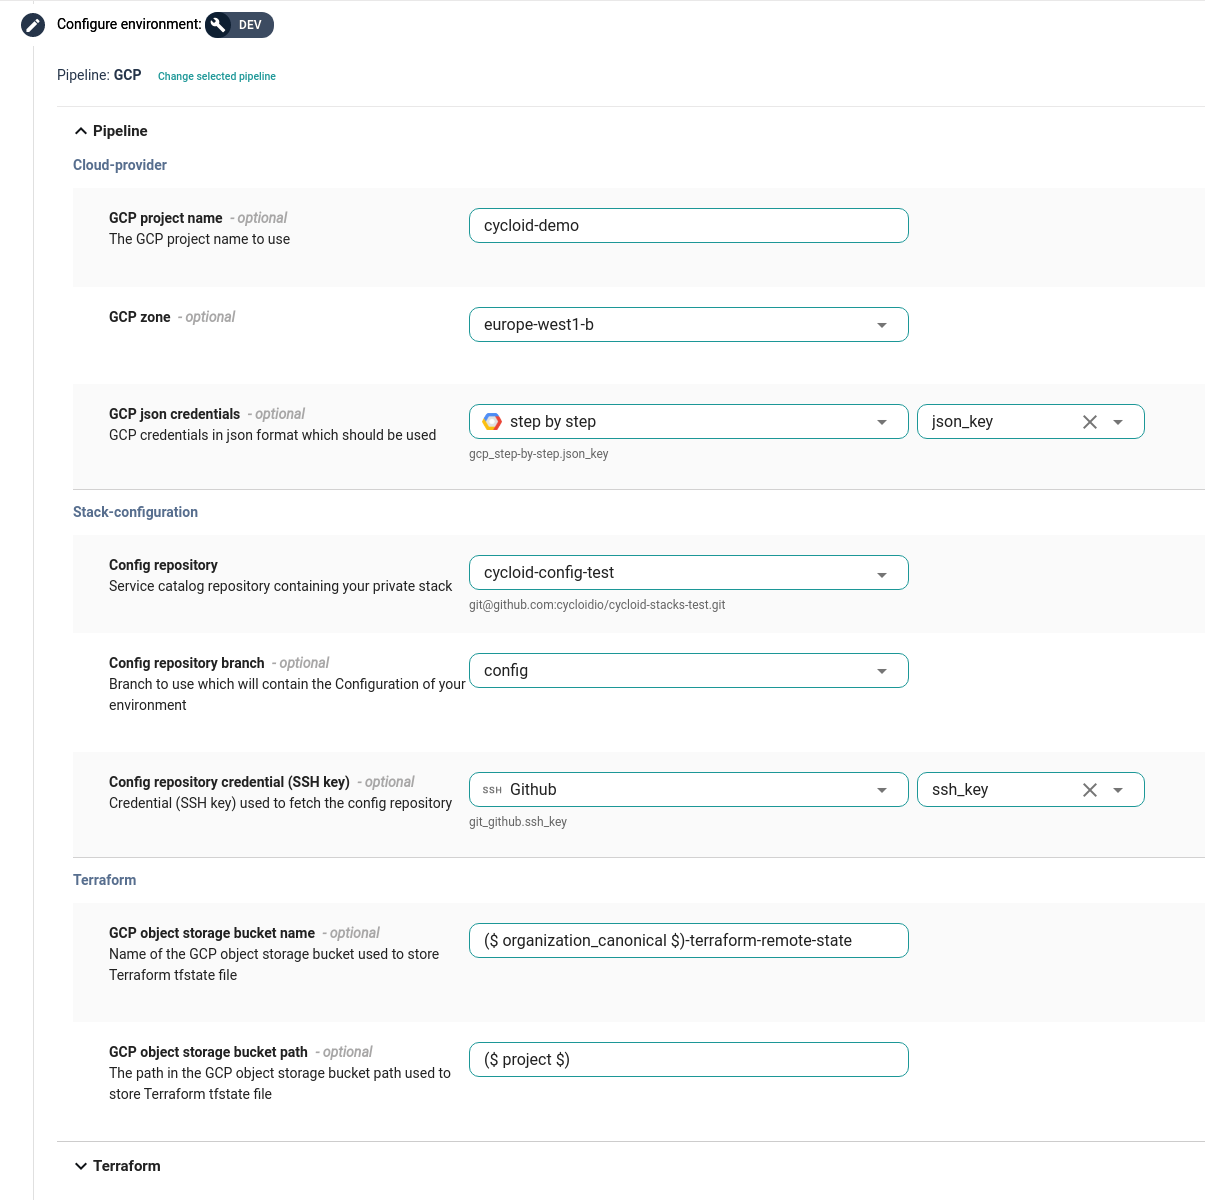
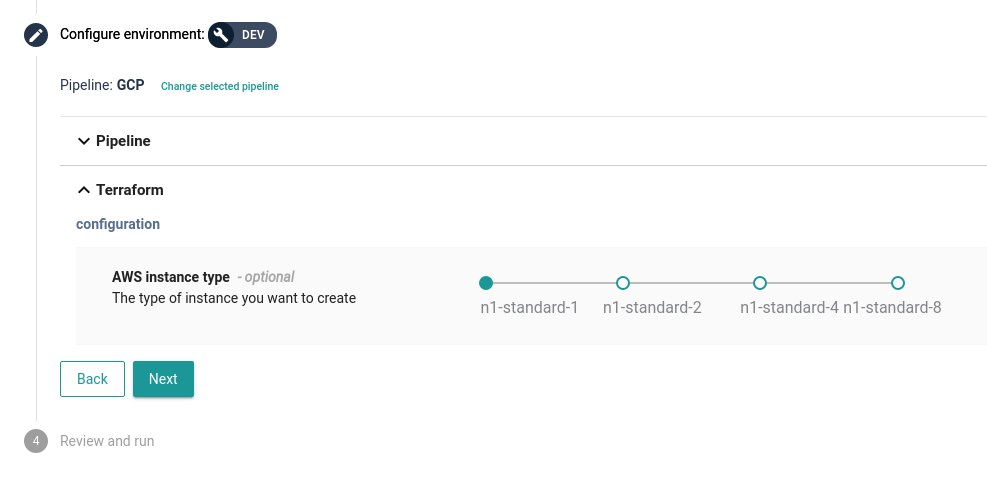
# Configuration
If the Use StackForms interface is enabled a user-friendly form with widgets, hints and dropdowns will be used to configure your stack.
Form view by StackForms
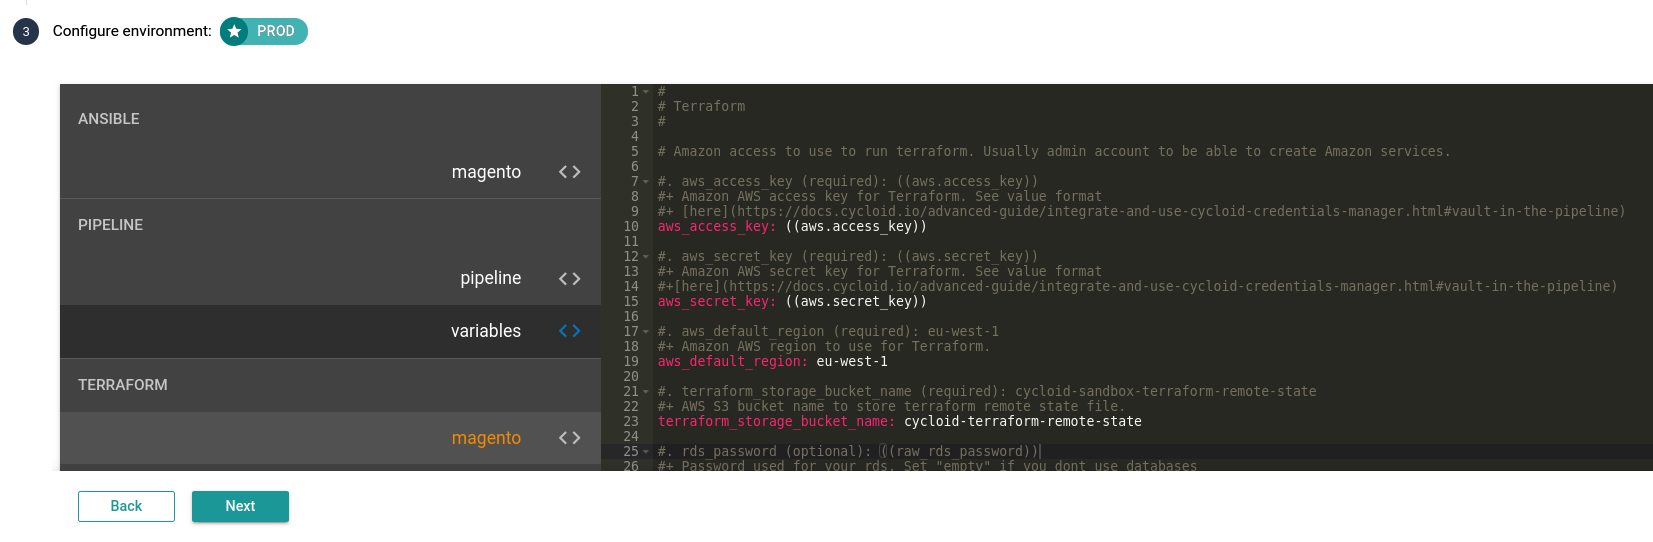
Optional code editor view
This view is usually reserved for advanced users who want to use specific configurations. In the code editor view all configuration and pipeline template of your stack will be editable in a text editor.
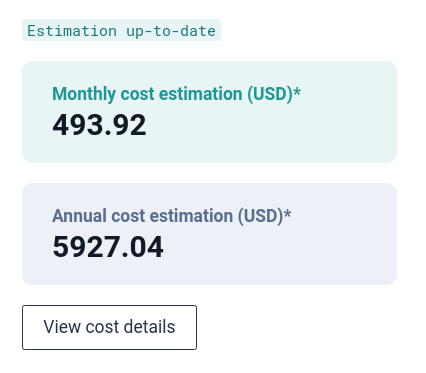
On the right side section, an estimation of the cost to create the infrastructure is given via our Cost estimation feature.
This estimation is done by our opensource tool TerraCost based on a price estimation given by reading Terraform files.
After configuring the environment, click the Next button to review and run.
# Review & Run
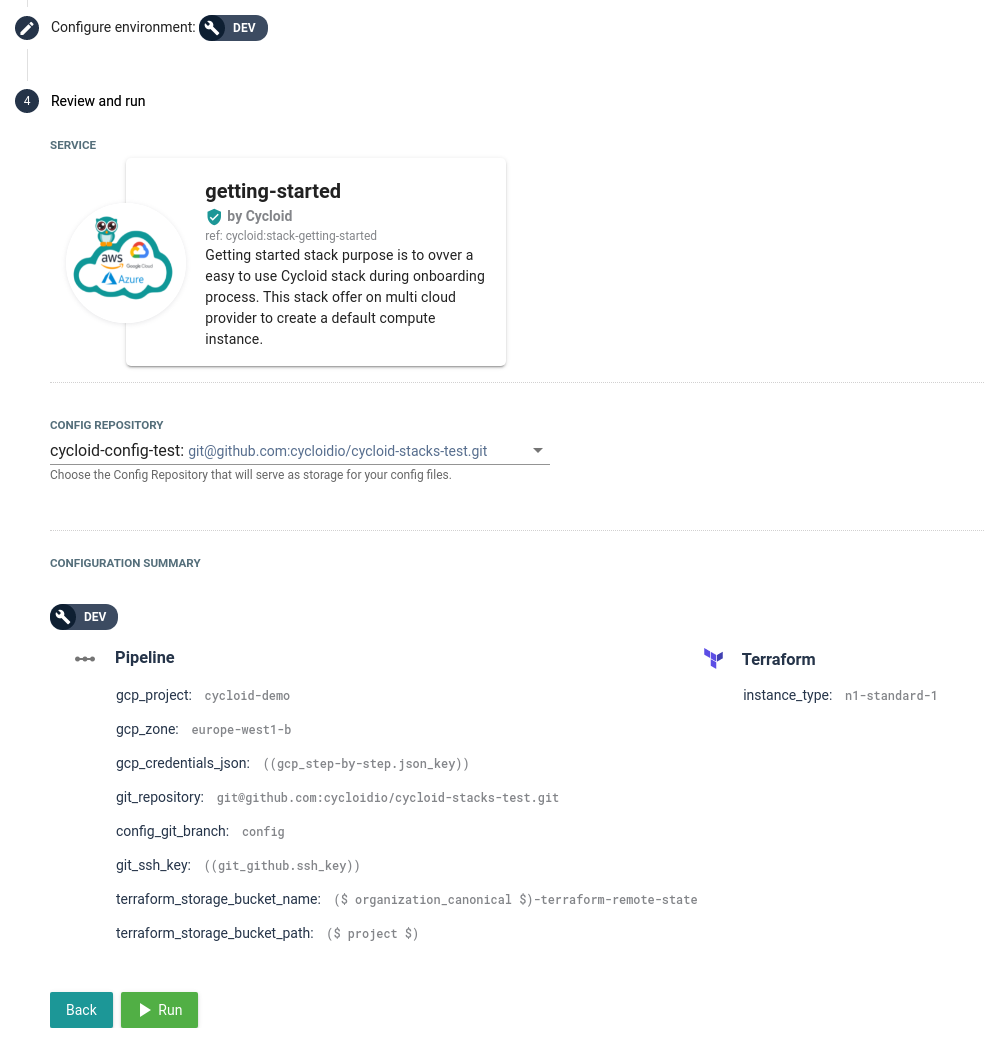

A config repository is required to store the configuration of your project like pipeline variables and configuration files for the stack. After reviewing the infrastructure and configuration, simply press Run and you can start exploring the management part of the onboarding.
← Configuration Manage →