# Quotas beta
Quotas allow you to control the resources teams can use by creating memory, storage and CPU limits. This is a way of controlling or restricting your server usage. Quotas are applied on teams, you can create and restrict as many teams as needed.
WARNING
This is a BETA feature and only works in the context of bare metal infrastructure
# Quick start guide
Note
As quotas can be applied to teams only, your users need to be organized in teams.
To start using quotas first, you'll need to:
Enable quotas
Go into your organization settings then to the general tab and toggle quotas on. Keep in mind that once you’ve started using quotas, you won't be able to disable the feature as long as you have quotas in use.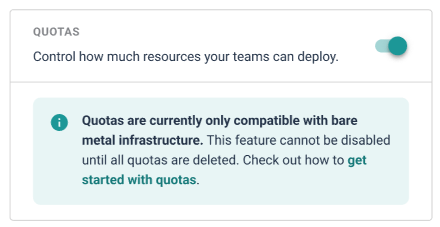
Add resources
Before creating quotas you will need to describe your current infrastructure: for each server you have, add a resource, enter the server capacity and set a label to identify it.
This is done through the Add resource button in the Resource pools page.
Add a resource pool
To start using quotas, at least one resource pool is needed.
Resource pools are logical abstractions made for grouping resources through labels, so you can set quotas directly on them.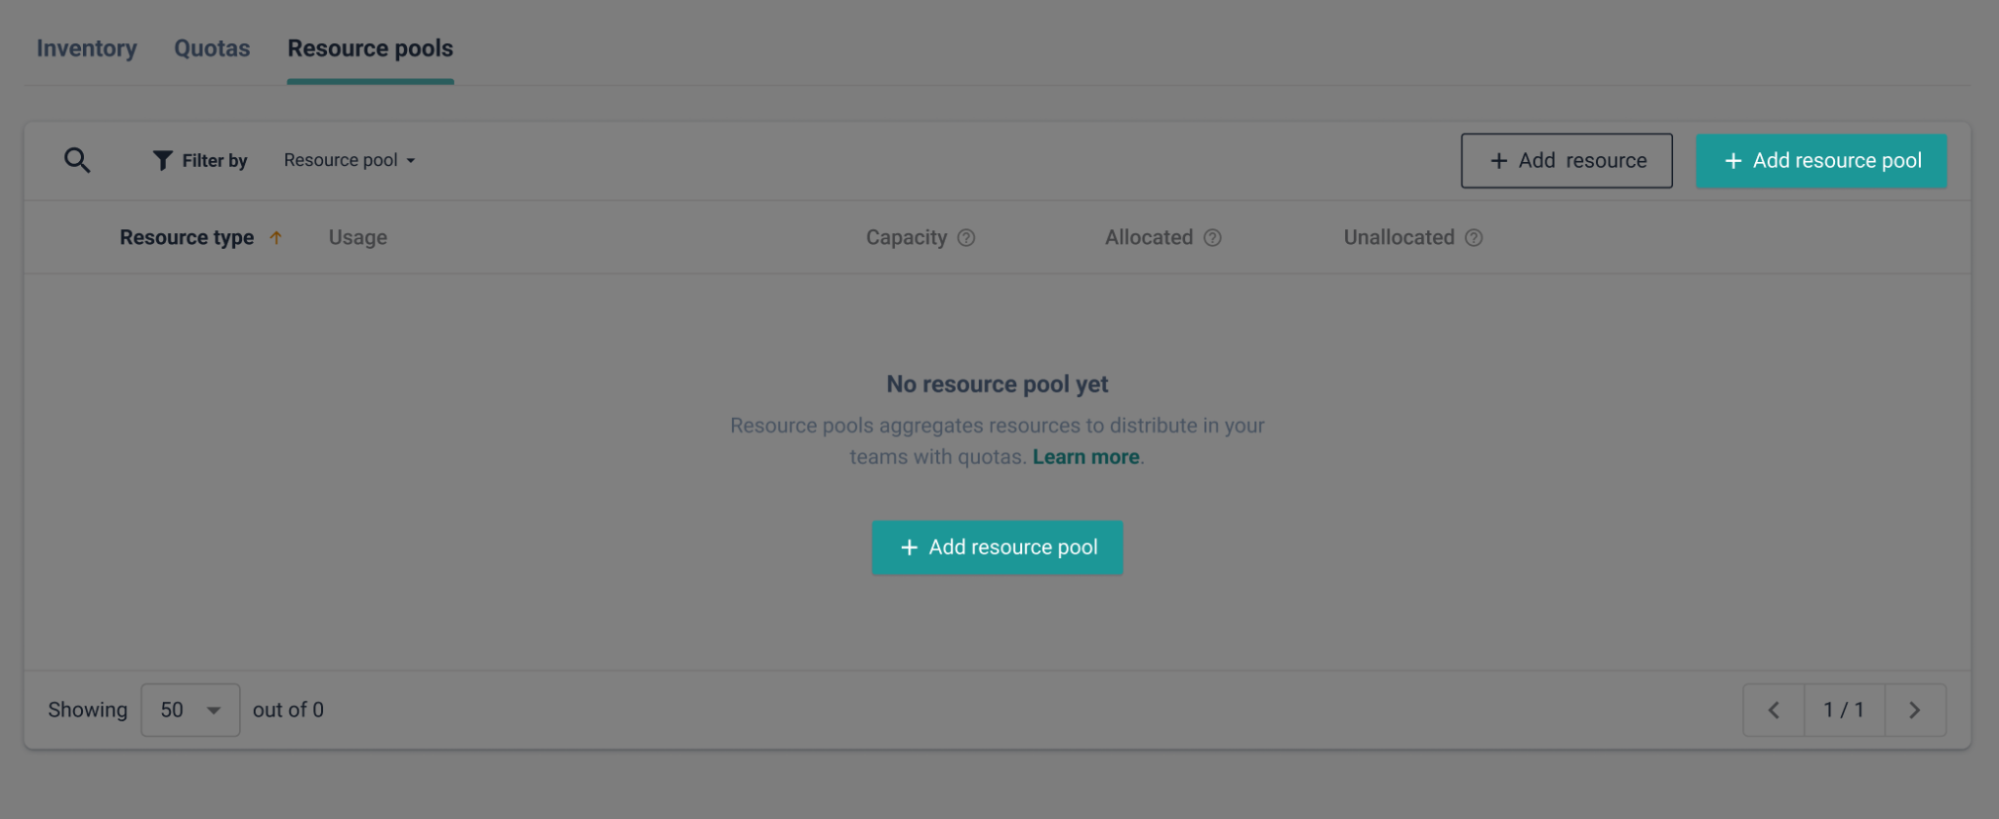
Add quotas
All good, now head over to the Quotas page and click on the Add quota button to create your very first quota.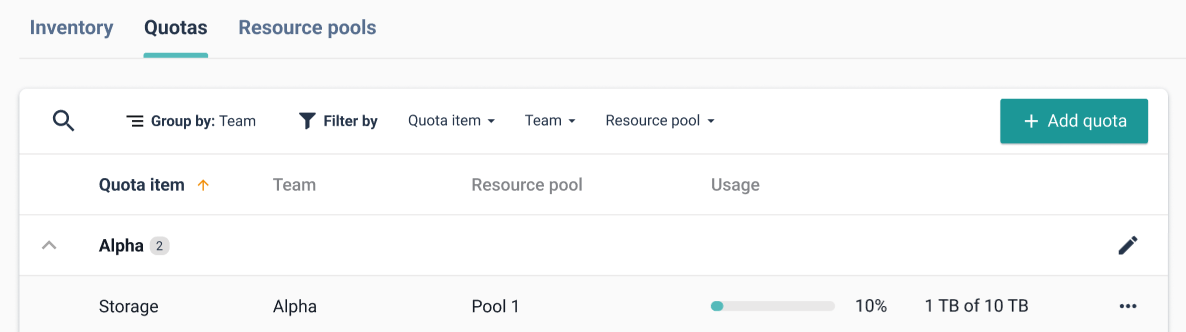
# Resources
# Definition
Resources are a tool to define all Bare metal resources (Servers - memory, storage and CPUs), since every time you deploy a project quotas need to be impacted, it is important to define the overall capacity of your servers.
# Adding Resources
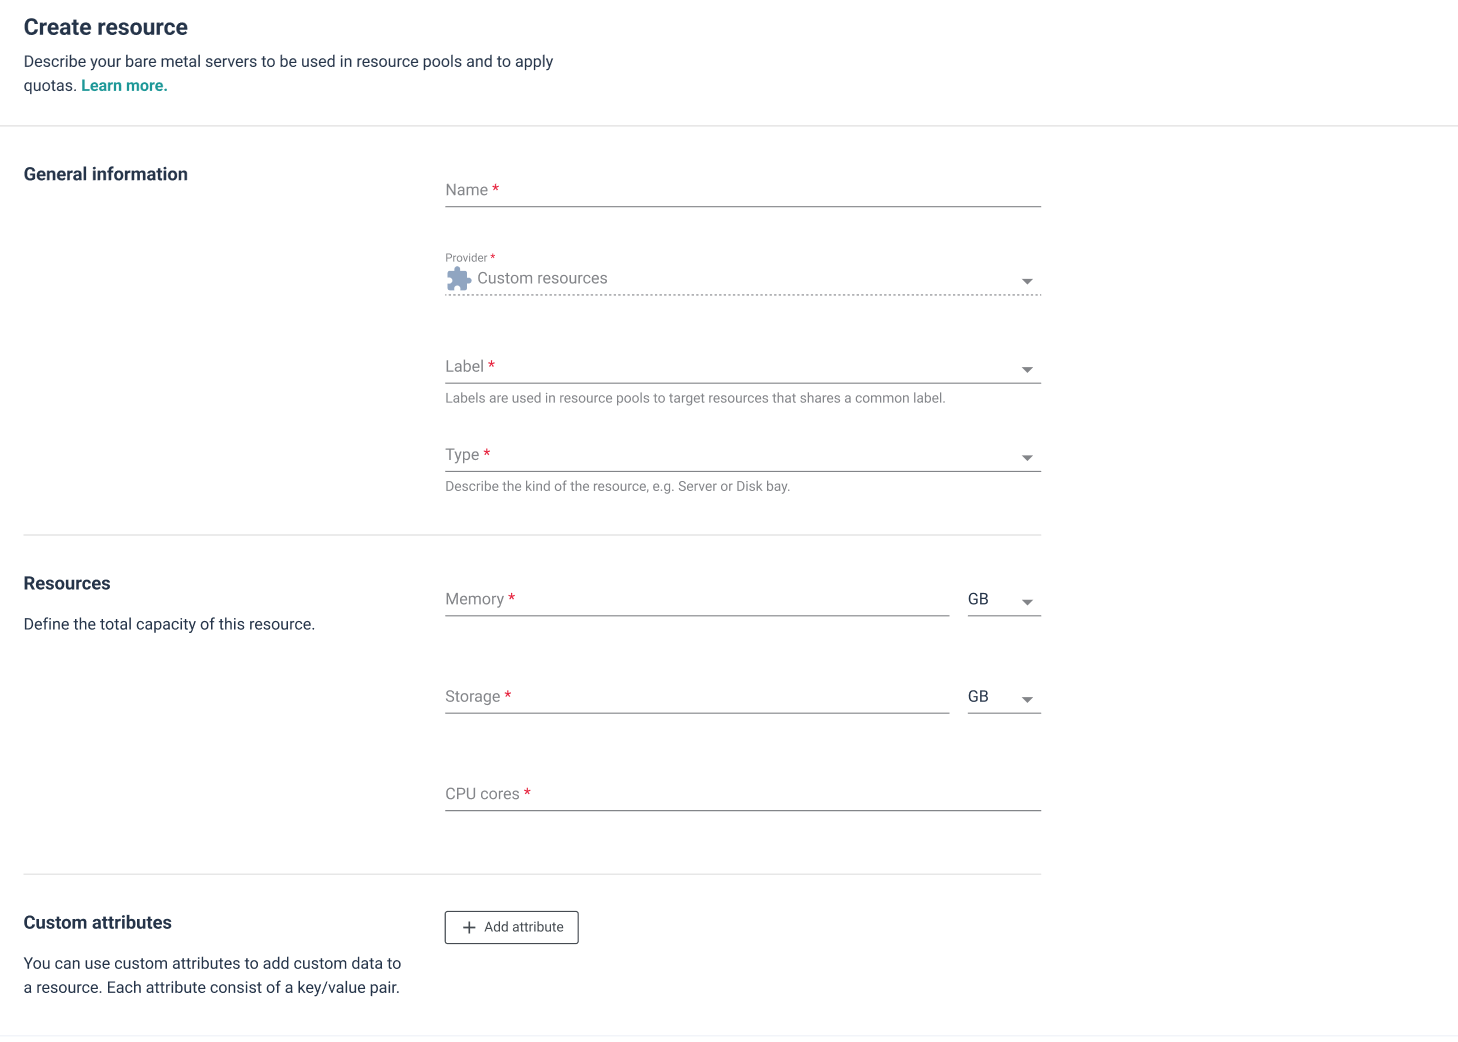
To create resources, head over to Resources > Resource pool > Create resource. The following information must be provided:
- Resources need a name to be identified
- The provider is “custom resources”
- Define or select an existing Label. Labels will be used to identify, match and import resources when creating resource pools.
- Type helps you categorize the different kind of resources you have, i.e. Server or Disk bay. Note that you can filter resources by types within the Resource inventory.
- Then define the resource capacity, here you need to define the value for Memory, Storage and CPU.
- You can define custom attributes (this step is optional). Custom attributes are used to add custom data to a resource. Each attribute consists of a key/value pair.
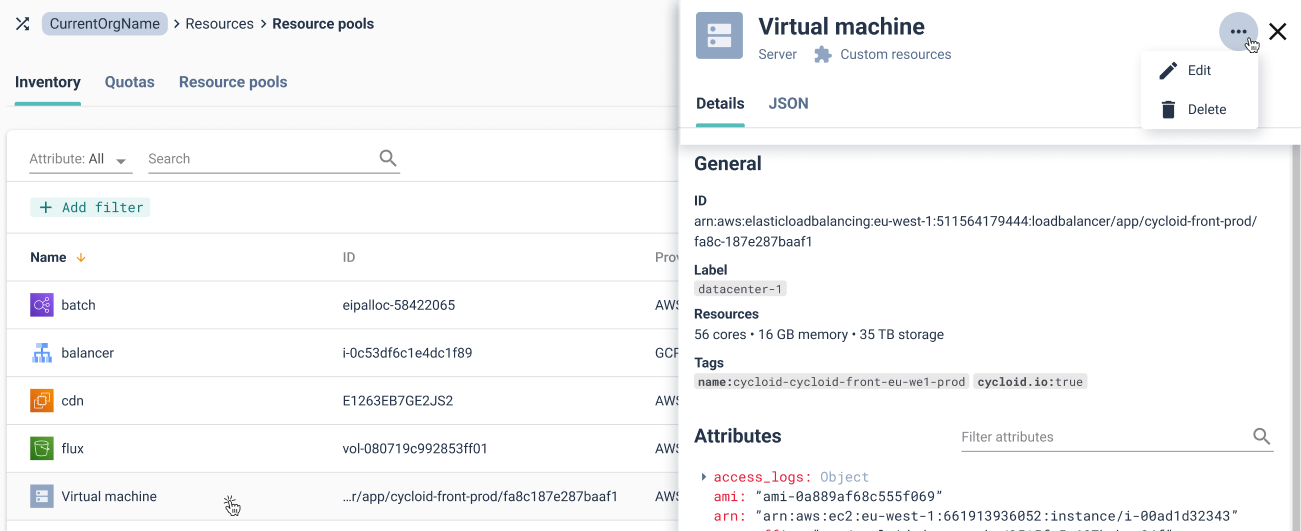
# Editing Resources
To edit a resource, you need to locate it in Resources > Inventory. Open the details panel, and in the contextual menu you’ll find the edit option (this option is exclusively for custom resources). You can edit the resource capacity and change the name.
# Deleting Resources
You can delete a resource, as long as the resource pool has enough capacity left to sustain the current team consumption. If this is not the case, first you’ll need to add more resources in order to compensate for the resources you are trying to delete.
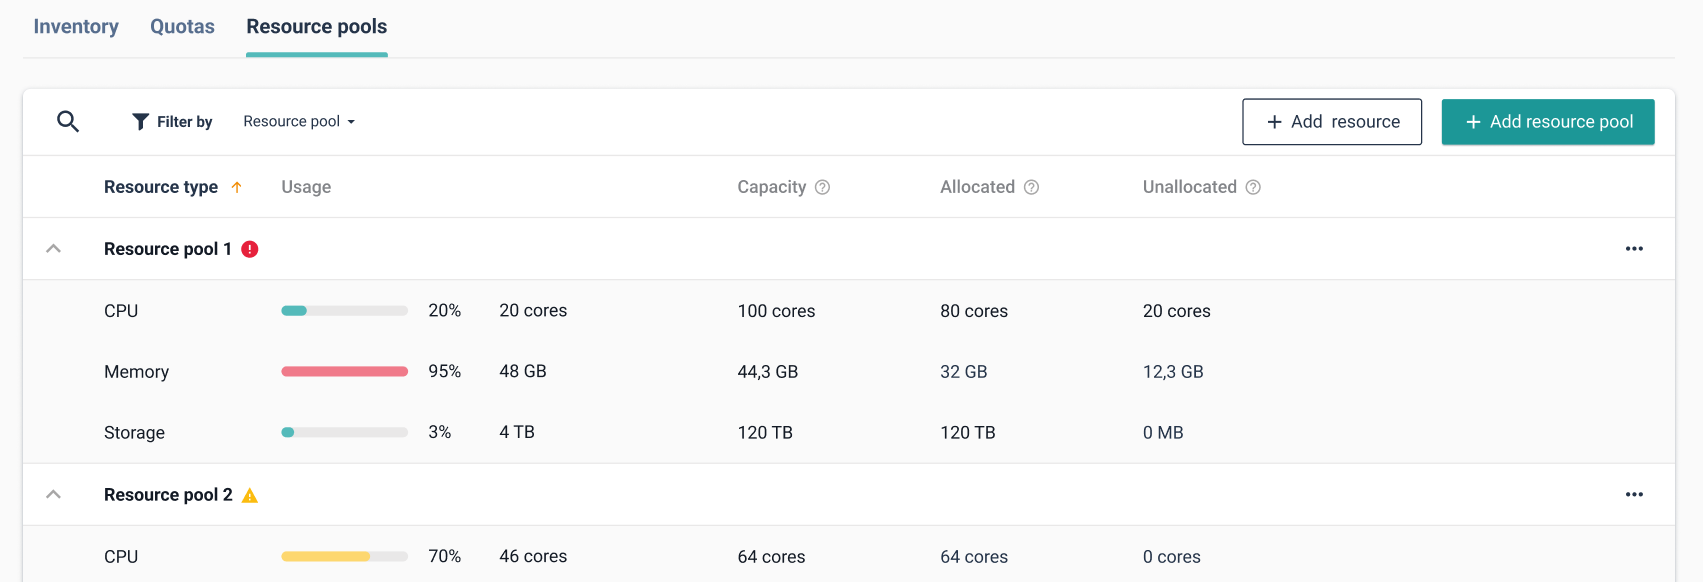
# Resource pools
# Definition
Resource pools are logical abstractions used to group resources by label, so you don’t have to create quotas for each server you have.
You can create as many resource pools as you need.
They are composed of a name and a label to identify and associate resources. Labels are defined through the Resource creation process. Labels cannot be used in more than one resource pool at a time.
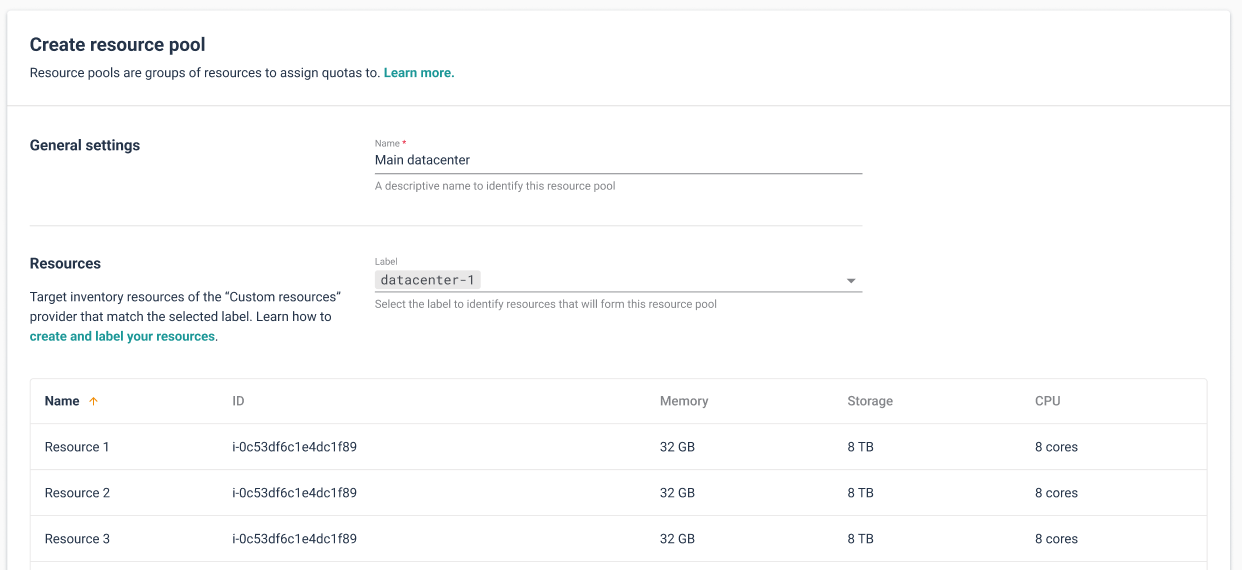
# Adding resource pools
To create a resource pool, head over to Resources > Resource pools > Create resource pool (make sure you’ve already created your resources and labels).
Here you need to define a name for the resource pool, and select a label to associate resources to it (Memory, Storage and CPUs). If there is no label to show, this could be either because you haven’t created a resource yet or because other resource pools are already using the created labels. Two resource pools cannot reference the same label.
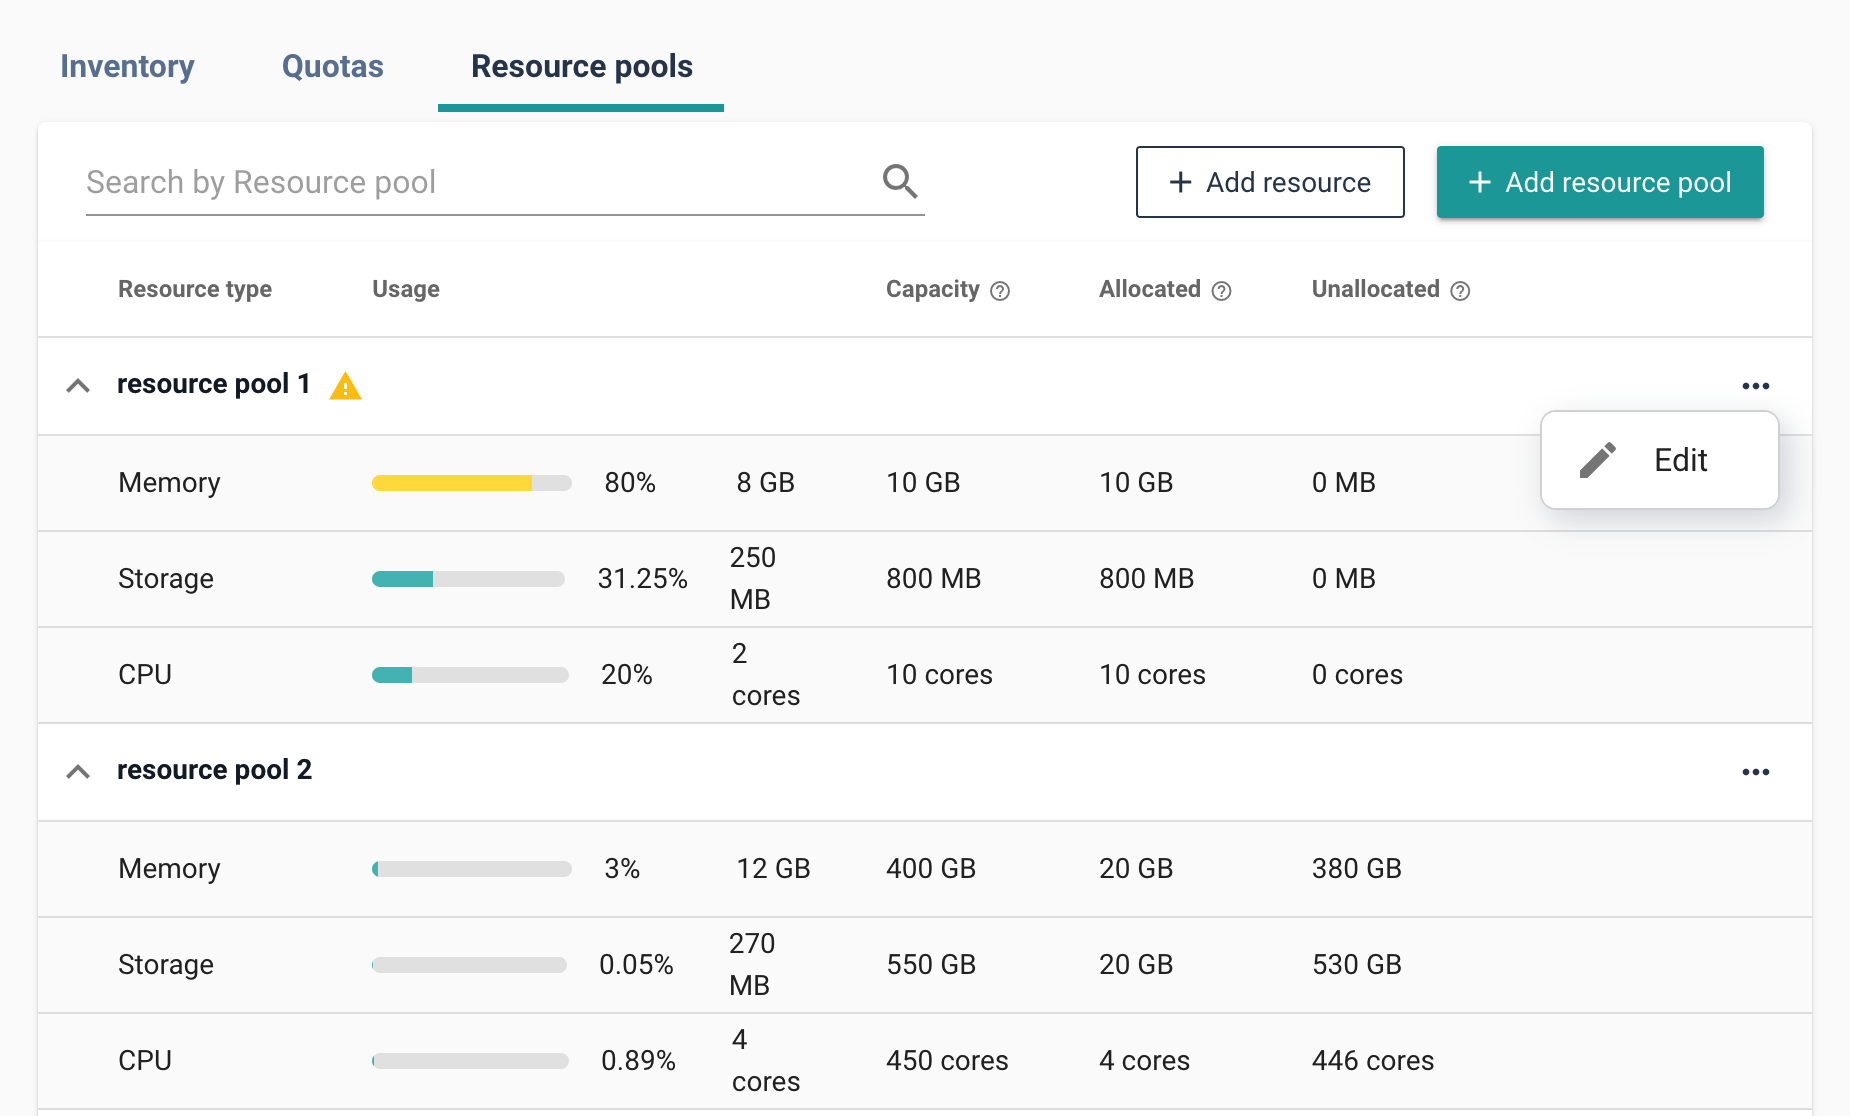
# Editing resource pools
To edit a resource pool, header over Resources > Resource pools and open the More Options menu to the right of the desired resource pool where you can find the edit option.
You can edit the name or change the Label to another one with the sufficient capacity, otherwise the operation will fail.
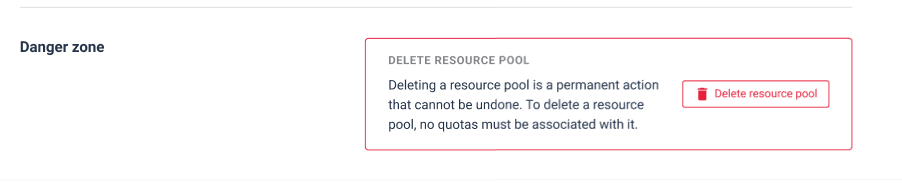
# Deleting resource pools
From the edit view, you can delete resource pools. This action cannot be undone. In order to succeed, there cannot be quotas using this resource pool. If this is the case, you will have to delete them and try again.
# Quotas
# Definition
Quotas are a tool to limit resource usage (bare metal ones) when deploying environments. Quotas are applied through teams, so make sure you have your users organized in teams before setting up quotas. The Quotas feature must be toggled on from the organization configuration page. Once enabled, and you have settled up some quotas, you can't disable them unless existing quotas are removed from teams.
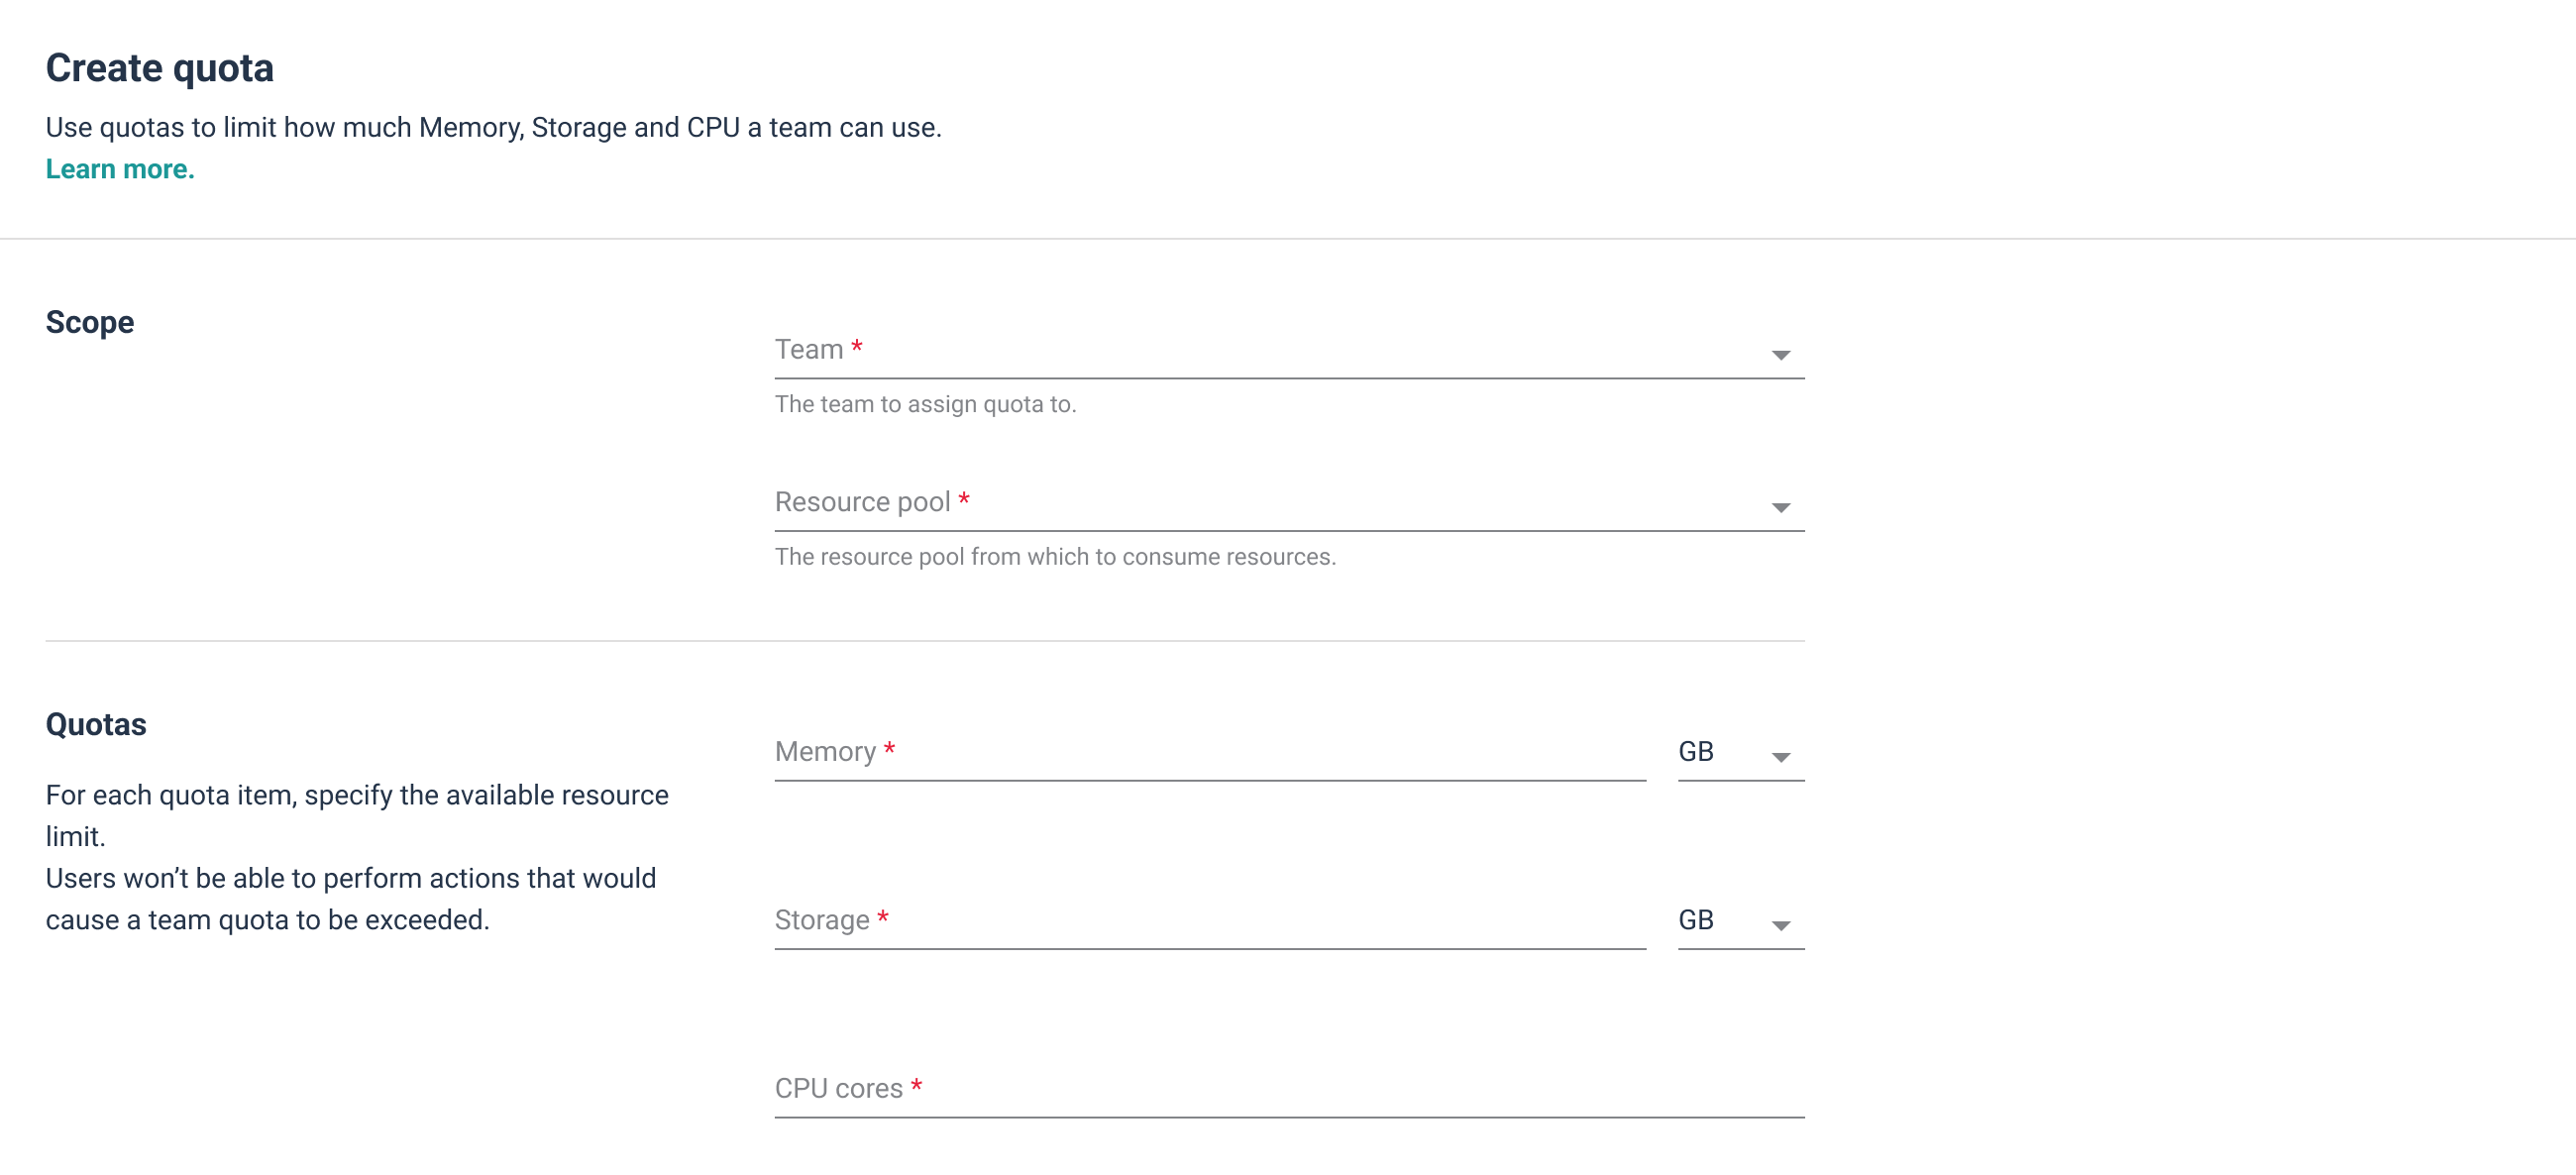
# Adding Quotas
To start with quotas, first make sure you have created your resources and at least one resource pool. Then head out to Resource > Quotas > Create quota.
# Editing Quotas
For editing quotas, head over to Resources > Quotas then on the quotas list enter the contextual menu on one of the quota groups or directly in one of the resource types and hit edit. When editing, you are able to modify the quota value to increase or decrease the quota.
Resource pools cannot change once quotas are created, but it is possible to create multiple quotas for the same team using different resource pools.
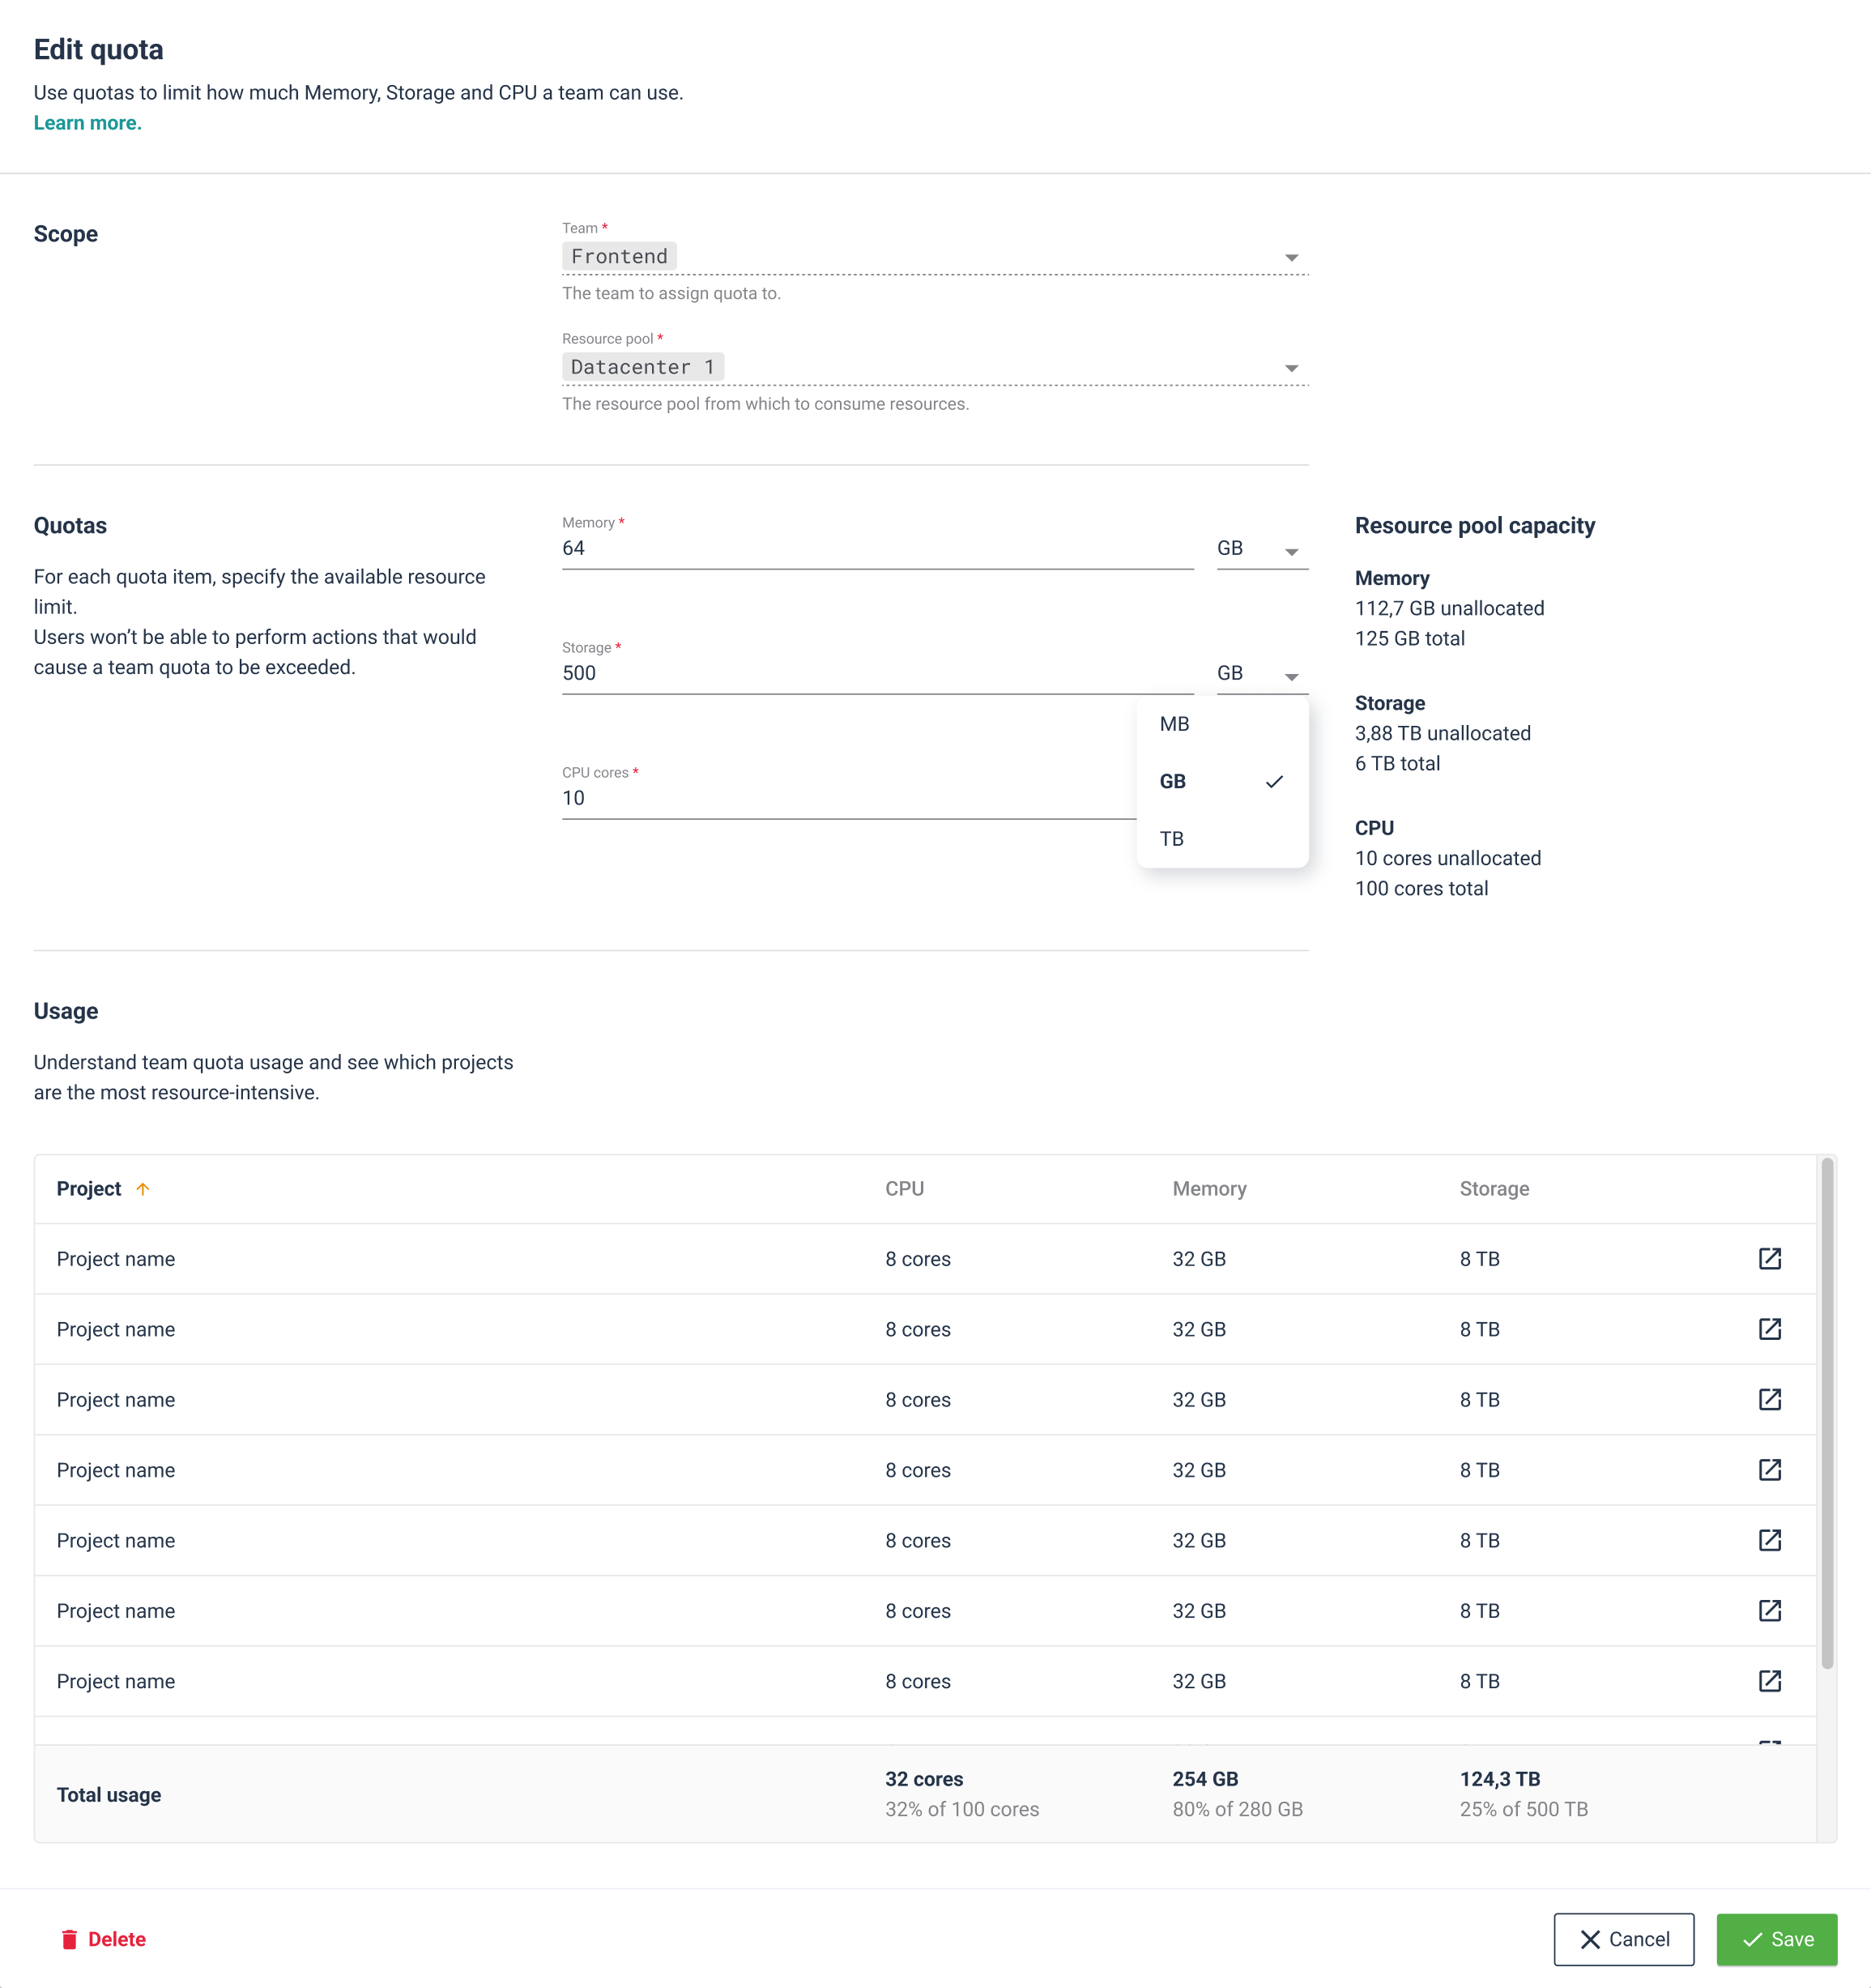
# Deleting Quotas
From the edit view, you can delete quotas. Note that this action is not reversible. This action won't delete your resources nor free space in your cluster.
# Deploying a project with quotas
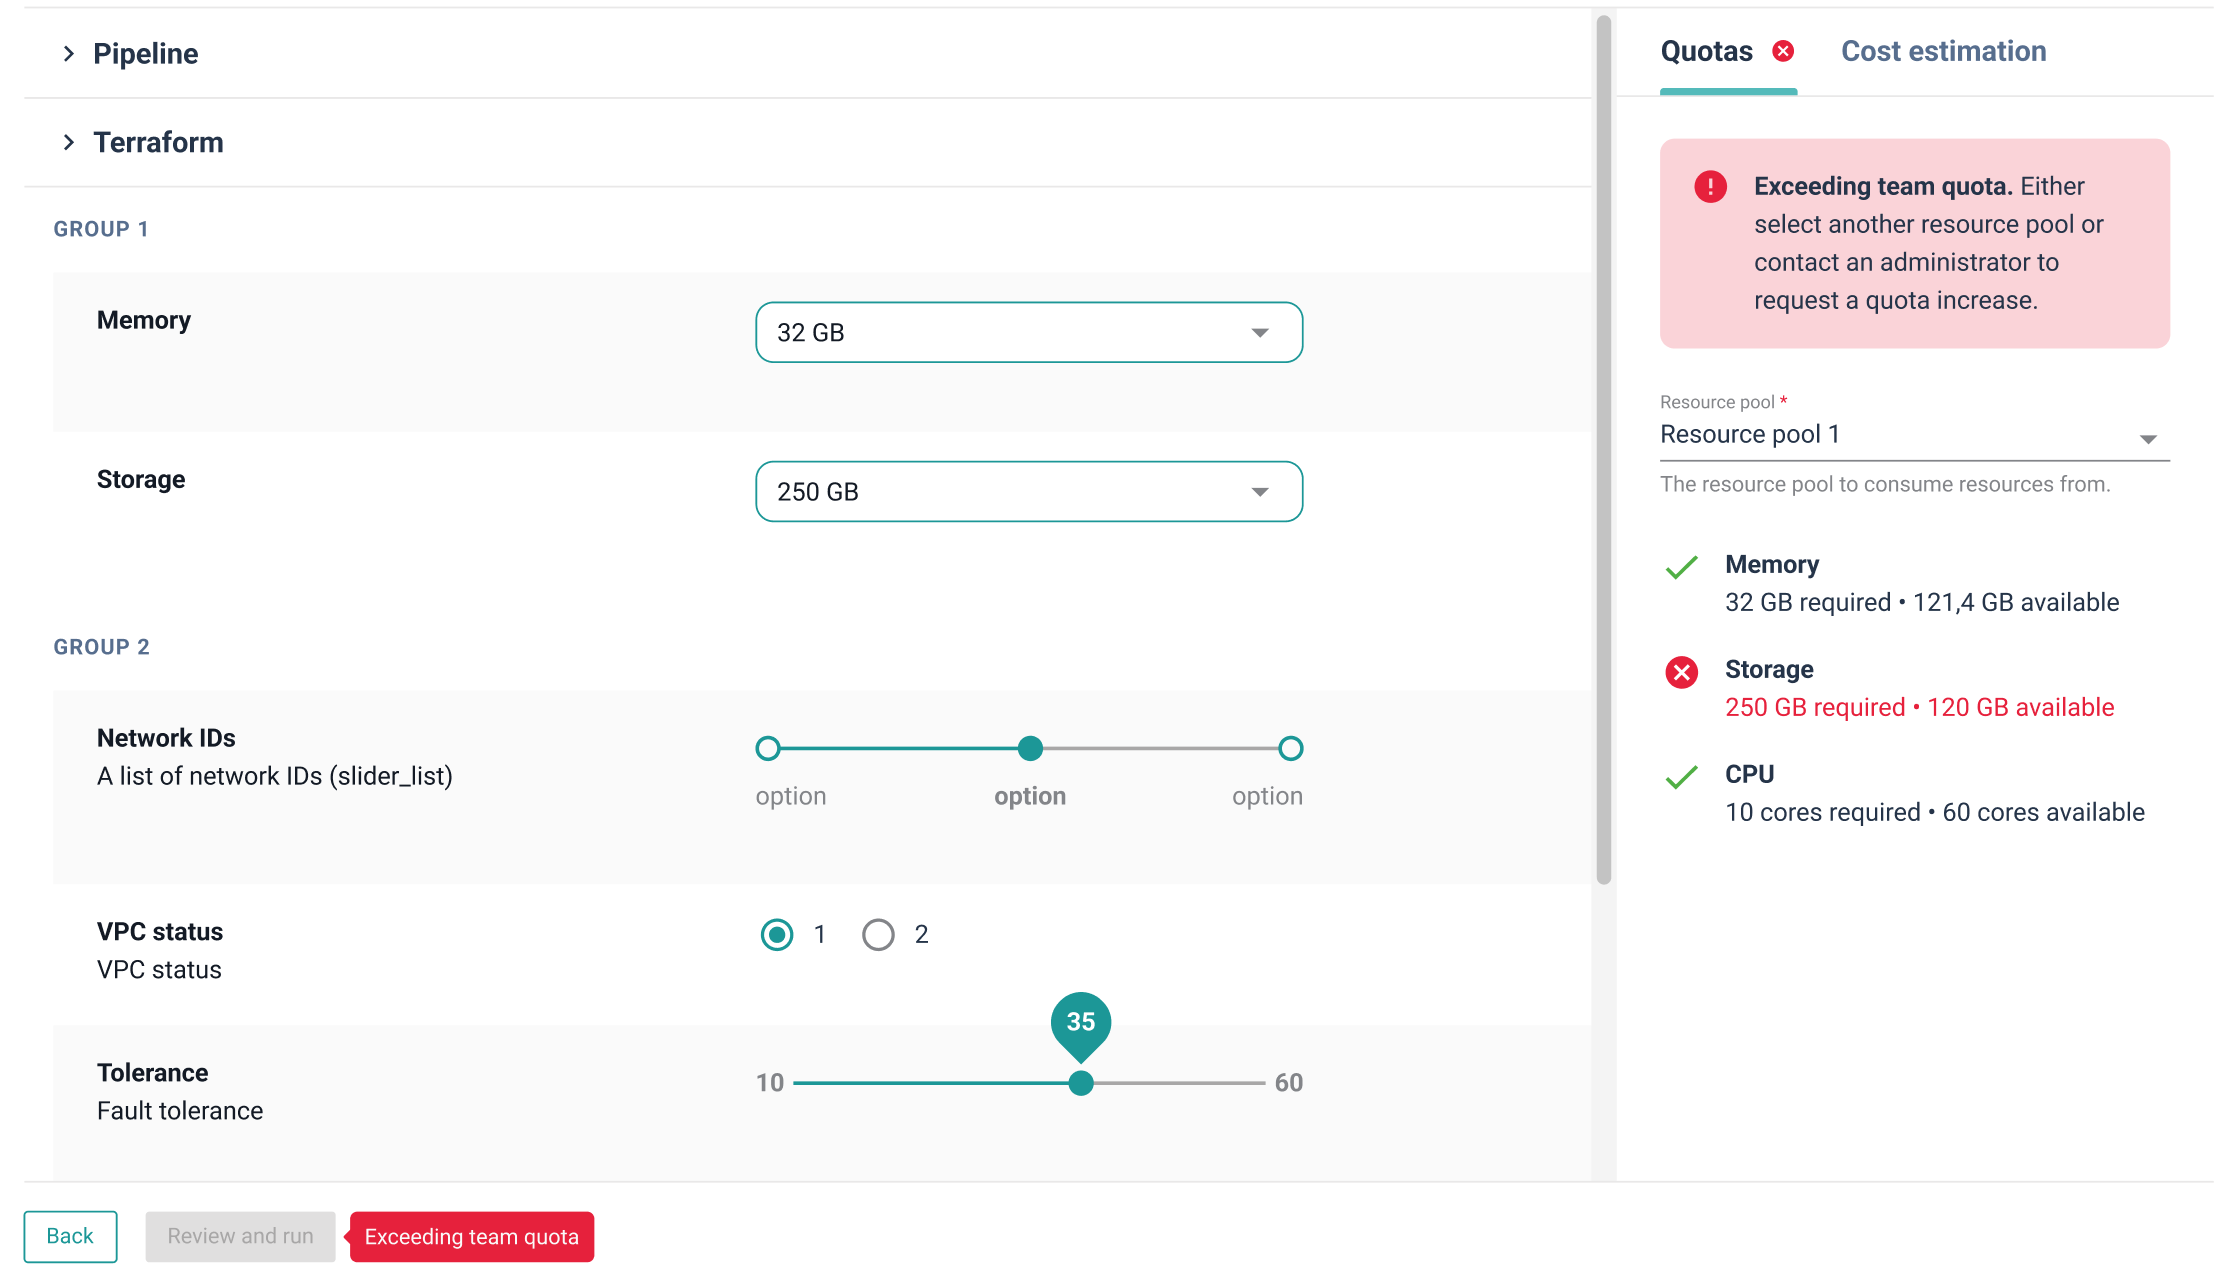
When quotas are enabled, to be able to deploy a project, you need to have enough quota available or else you won't be able to deploy.
Note
When trying to create a project, team selection is essential. You won't be able to create projects unless you belong to a team with quotas. If you belong to more than one team, you would be able to select which team quota to impact before creating a project.
If quotas are enabled, but you belong to a team with no quotas set up, you won't be able to create a project. An administrator should first set up some quotas for this team.
On the right side of the quota creation process, you'll see all your quota remaining information, to be able to check if the resource consumption of the configuration you choose for the project is compatible with your available resource quotas.
If the team selected for the project creation has more than one quota associated with them, you’ll be able to choose which of them to impact by changing the resource pool on the dropdown menu.
Note
In-use quotas are tracked for each project environment. When deleting an environment, the quotas used by that environment will be released and the available team quotas increased accordingly.
# Creating a Stack with quotas
For a stack to impact quotas,the quota_config attribute needs to be set on widgets defined inside the .forms.yaml file.
quota_config comes with the following attributes:
| Attribute | Description |
|---|---|
type | Describes the kind of resource to impact. Can be set to either "cpu", "storage" or "memory". |
mapping | Used to declare a direct mapping from one of the possible values of the entity and the quotas it represents. |
count_ref | Defines a path to a quota multiplier. |
Units
storage and memory quotas are always expressed in megabytes (MB). There is currently no way to use another unit.
# quota_config.type
Any widget that holds an integer value can impact quotas. Use the quota_config.type parameter to set the kind of resource to be impacted. When set, the widget value will count towards the selected quota type.
Example
- name: "Volume Size"
  description: "Size of the volume in megabytes (MB)."
  key: module.vm.vm_disk_size
  widget: slider_range
  type: integer
  default: 512
  values:
      - 512
      - 1024
      - 2048
  quota_config:
    type: "storage" # Impact the storage quotas
2
3
4
5
6
7
8
9
10
11
12
# quota_config.count_ref
When your stack exposes a resources with a dynamic number of instances, you can use the count_ref to multiply a widget quotas impact by the value of another widget. It needs to reference a widget of type integer, defined within the same Use case.
Example
- name: "Volume count"
  description: "Number of volumes to create"
  key: module.vm.vm_volume_count
  widget: number
  type: integer
  default: 1
- name: "Volume Size"
  description: "Size of the volume in megabytes (MB)."
  key: module.vm.vm_disk_size
  widget: slider_range
  type: integer
  default: 512
  values:
    - 512
    - 2048
  quota_config:
    type: "storage"
    count_ref: module.vm.vm_volume_count # Multiply the Volume size value by the number of volumes
2
3
4
5
6
7
8
9
10
11
12
13
14
15
16
17
18
# quota_config.mapping
You can map a widget values with their corresponding quotas impact using the mapping attribute. Each value has to be mapped using a specific CSV list format, each item with the following syntax"$COUNT $TYPE" (like: "1 cpu").
When using mapping, a single widget can impact multiple quota types.
Note
It's possible to use quota_config.mapping along with quota_config.count_ref to multiply the selected mapping value.
Example
Exposing a dropdown to select an instance type with each value mapped to a quotas impact.
- name: "Vm type"
  key: module.vm.instance_type
  widget: dropdown
  type: string
  default: "t2.small"
  values:
    - "t2.small"
    - "t2.medium"
    - "t2.large"
  quota_config:
    mapping: # Map each value with the corresponding impact on quotas
      "t2.small": "1 cpu, 2048 memory"
      "t2.medium": "2 cpu, 4096 memory"
      "t2.large": "2 cpu, 8192 memory"
2
3
4
5
6
7
8
9
10
11
12
13
14